This post may contain affiliate links. When you click on a link, you are supporting DIY Party Mom, my family, and our blog fun. Thank you for your love and support!

Wizard of Oz Birthday Party

Wizard of Oz Birthday party by Kims Kandy Kreations
This Wizard of Oz Birthday party has been a long time coming.  I started with it being a graduation party, but we missed that due to the Colorado Wild Fires and ended up just using it to celebrate the graduates birthday since we had already started all the preparations.


It ended up being a simple but fun affair and I wanted to show you the sweet treats and ideas that we came up with.

Yellow Brick Road Wizard of Oz Pennant Banner
I started by using the Photo Booth Backdrop that I showed you how to make a while ago.  I use it as the  basis for all my backgrounds.  It's so quick and easy to assemble and take with me wherever I need to go to throw a party.  I put a blue tablecloth on the back and used my Yellow Brick Road pennant banner to welcome the guests to the Emerald City dessert table.

Wizard of Oz Character Cupcakes with Dorothy, Tin Man, Scarecrow, Cowardly Lion, Glinda the Good Witch and the Wicked Witch of the West
In the center of the table, I placed my Yellow Brick Road plastic canvas table runner.  On the table runner, Dorothy and her friends are on our cupcake toppers and are walking the yellow brick road to get to the Emerald city sucker stand in the back.  The sucker stand has 3 inch whirly pops on it for each guest.

Wizard of Oz Dessert Table with Homemade Ding Dongs
To the left of the Yellow Brick Road, we had "Ding Dong the Witch is Dead" Ding Dongs.  Since you can't find ding dongs anymore (although I'm hoping the new Hostess will have them out soon...YUM!) I found a Homemade Ding Dong recipe by Bean Town Baker.  I wrapped them up in silver foil to give them the original Ding Dong look and placed them on a yellow plate that I found in the summer section at Walmart.
Next to the Ding Dongs, we had "Munchkin" Donut Holes and Rice Krispie Treat Chocolate sunflower treats. 

Wizard of Oz Party Dessert Table with M&M Chocolate Covered Pretzel Wands
On the other side of the table, we had "Glinda the Good Witch" Chocolate covered Pretzel wands.  I covered the pretzels with chocolate and then with mini M&Ms.  These were a definite hit.  Then we had "Lions, Tigers, & Bears" chocolate animal crackers.  In the back we covered rice krispie treats with our yellow milkies to make Yellow Brick Road Bricks.

Dorothy Wizard of Oz Character Table Cards with Munchkin Donuts
One of my pet peeves is to go to a party or potluck and not have any idea what you are eating.  So we continued our table card tradition and labeled each of the foods with fun and informative treats.  Each of the Wizard of Oz Character tables cards have a blue background and a different character on it.  You can use these as food cards or name cards or game labels...just about anything.

Wizard of Oz Printable Ruby Red Slipper with Jewel Jelly Belly Beans
We ended up playing Pin the Heart on the Tin Man, but I was so busy that I forgot to take pictures of us doing it.  We also played a Wizard of Oz bingo game and a few others.  We ended up giving out the Ruby Red Slipper Jelly Belly treats as prizes for each of the games we played.  That was a big hit with all the girls who won.

Wizard of Oz Games Tic Tac Toe game
As a party favor to all our guests, we gave out the Wizard of Oz Tic Tac Toe games that we made and the Yellow Brick Road candy toppers as parting gifts.  I think the kids all had a good time and I am so excited to have been a part of this special day!

How to Fill a Template in Gimp with a Custom Background

How to fill a template in Gimp with a custom bacgkround by Kims Kandy Kreations

Have you ever been so excited to have learned to do something and then later when you went back to do it again, you forgot how?  This is how I am with a lot of my computer projects.  I am not the most computer savvy person around (despite having done this for several years now.)  It's not usually until I need to do something that I learn how.  Otherwise, I'm pretty clueless.


Long ago, I learned how to fill a template in Photoshop.  Now, three computers later, I don't have Photoshop anymore.  And I'm not paying the huge price tag to repurchase it.  So instead, I've been slowly teaching myself how to use Gimp.  Haven't heard of Gimp?  It's a free image manipulation program that works much the same as Photoshop...and you heard me, it's FREE.

So, before I forget how to do this again, I'm sharing this tutorial on how to fill a template with a custom background in Gimp.  In this case, I'm making a Yellow Brick Road alphabet for my Wizard of Oz party.

To begin with, you need to download the Gimp program and open it.  You can find it HERE.

How to open a template in Gimp
To fill the shape you want to use, you will need to open the file in Gimp by going to "File" in the upper left hand corner and clicking "Open."  Find where you have saved your template and open it.  If you like, you can find the Blank Alphabet file that I used HERE.

Next, you need to prepare it to be used in your design by deleting the white in the background.  To do this, go to "Layers" and then "Transparency".  This will allow you to "Add Alpha Channel." (In this picture example, I've already done that so the link isn't highlited, but it will be for you.)

How to remove the white in a background in Gimp
To delete the white in the background, you will need to use your "Fuzzy Select" tool.  (You can do this by clicking the magic wand tool in the toolbox or by clicking "Tools" and the "Selection Tools" and then "Fuzzy Select Tool."

Once you have this tool, click the area that is white and needs to be removed.  You will see a dotted line highlighting the area.  Now either click "Delete" or go to "Edit" and then click "Clear."  This will make the area into a Checkerboard background to show there is no color left.

how to make a custom background in gimp
Now to make a custom background in Gimp, you need to find a background that you like.  I designed up a Yellow Brick Road background image and saved it as a jpg file.  To use it as a custom background in Gimp, you will need to open the file in Gimp and open it, just like you did your alphabet letter or other design.

Now you need to either right click or go to "Edit" and "Copy" your background.

How to fill a template in Gimp
Go back to your template (or alphabet letter) and find your pattern in your "Layers and Channels toolbar."  The first block should have your clipboard graphic in it.  In this case, you can see my Yellow Brick Road pattern.  Click on it to select.

Now "Fuzzy Select" the area that you want to fill.  In this case, it's my alphabet letter.  Right click on it or go to the top of the screen to "Edit".  Now click on "Fill with Pattern."
How to save a file in Gimp
Your template should now be filled with your background graphic.  So you need to save this.  Go to "File" and "Save As" Find where you want to save your graphic.  REMEMBER where you save it.  (That's usually one of the hardest things for me.)  In this case, I created a file called "Yellow Brick Road Alphabet" in my pictures file.

You can see that my file is trying to save it as "A.jpg" in the "Name" area at the top.  To keep the file transparent, you need to save it as a different file extension.  My favorite is a "PNG" file.  So name your file.  In mine, I named it as "Yellow Brick Road A.png"  Be sure to add the (dot) png at the end so it knows how to save.  Now go ahead and click save or "Enter" and just keep hitting "Enter until it's saved completely and returns you to your file.

Now your done with your template.  Depending upon what you want to do now, you have a transparent file that can be added to any other graphic or file to complete your project.  

Wizard of Oz Pennant Banner
  I made a pennant banner with mine by using Printmaster.  (I'm a huge fan of it and use this program for most of my designing.)  I am excited with how this turned out and can't wait to add it to my Wizard of Oz party table.  Plus, maybe now, I'll remember how to do this for next time.

10 Wizard of Oz Game Ideas

Wizard of Oz Party Game Ideas by Kims Kandy Kreations
You've got your Wizard of Oz party decorations planned but now it's time to think about what to DO at your birthday or graduation party.  Here are 10 fun game ideas to get you and your guests moving and having fun.


Wizard of Oz Yellow Brick Road Maze
1. Yellow Brick Road Maze by Education.com

Wizard of Oz Pin the Heart on the Tin Man game
2. Pin the Heart on the Tin man by Home Made Mimi

Melt the Witch Water Balloon Game
3. Melt the Witch Water Balloon Game by Following in my Shoes

Feed Toto Bean Bag Toss Game
4. Feed Toto Bean Bag Toss Game by Easy Party Ideas & Games.

Cowardly Lion Obstacle Course
5. Cowardly Lion Obstacle Course by You Are In Good Company.

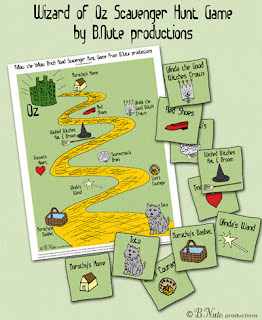
Wizard of Oz Scavenger Hunt Game
6. Wizard of Oz Scavenger Hunt Game by B.Nute Productions.

witch broom ring toss game
7. Witch Broom Ring Toss by Double Fun Parties.

Beat the Scarecrow Pinata Game
8. Beat the Scarecrow Pinata Game by Mama Mia Mama.

Wizard of Oz Matching Game

Wizard of Oz Tic Tac Toe Game

Wizard of Oz Yellow Brick Road Table Runner Plastic Canvas Pattern

When planning our Wizard of Oz party, I couldn't leave out the Yellow Brick Road from our party decorations.  But I wanted something a little more than a fabric table runner.  So I decided to sew my own plastic canvas yellow brick road table runner for the dinner table.


It was pretty easy too.  If you don't have much plastic canvas sewing experience, this is a good project to begin with since it's simple squares and rectangles with an easy stitch.

Start by cutting out 2 10x10 hole squares and 5 10x20 squares from plastic canvas.  Sew them with an easy slanted stitch in yellow yarn.

Using black yarn, place the right sides of the rectangles together and join the pieces in a brick pattern.  Use 3 rectangles on one line and 2 rectangles with a square piece on each end for another line.

Now sew the lines together making sure you alternate the brick pattern.  You can sew as many of these sections together as you like to make sure you get a runner long enough for your needs.

Here's the pattern if you want to try your own:

I can't wait to set this in the center of my table and follow the yellow brick road to a yummy dinner!


Wizard of Oz Party Backdrop


In looking at Wizard of Oz party ideas, I came across this fun Wizard of Oz party backdrop by Julie B. I just love how simple but amazing this backdrop is.  I think it would be really simple to make this too.  


If I were going to make it, I would start with our PVC pipe photo booth backdrop  and hang blue gingham curtains from the top of the frame and tie them back with red ribbon.

The green wall and window could be made from a piece of wood and paint.  The picture could be done with  this (12x36) Wizard of Oz Movie Emerald City Poster Print.  Now just add a yellow table cloth with a red tablecloth pinned to the front, and there you go!

Would you try this? 

Wizard of Oz Party Game: Tic Tac Toe Printable

wizard of oz tic tac toe printable game by kims kandy kreations
When Dorothy's house landed on the Wicked Witch of the East, I don't imagine she had any idea of the  battle between herself and the Wicked Witch of the East that would begin over a simple pair of Ruby Red Slippers.  And I don't imagine that she had any idea, that it would continue on into our Wizard of Oz party and beyond.


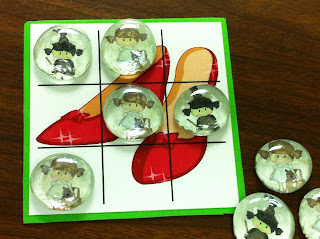
When thinking of fun party favors to give our guests, I decided to try and make a game where the fight for the red slippers would continue.  So this Wizard of Oz Tic Tac Toe game was born.  And it's a simple and cheap party favor idea which makes the battle all the more enjoyable.

wizard of oz game ingredients
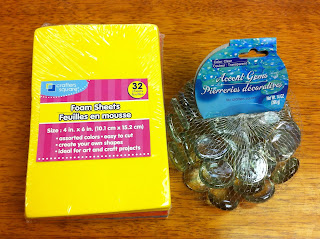
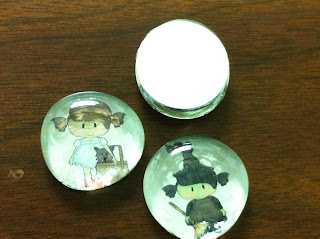
Originally I had planned to make these tic tac toe boards from a 4x4 ceramic tile, but I began to debate on the wisdom of giving kids breakable ceramic tile as party favors.  So when I found these foam sheets at Dollar Tree, I decided to go with them instead.  Plus, 32 sheets for a dollar is more than great for my budget.  I also picked up a bag of Accent Gems for the game pieces at Dollar Tree.

wizard of oz game printable
I printed out my game pieces onto card stock.  The foam sheets are pretty thin, so I thought that the strength of card stock would help with the durability of the game.

The game board is 3 3/4 inches square and each of the Dorothy and Witch pieces are 1 inches, so that was easy to cut with a circle hole punch.

This design contains artwork that is © 2006-2008 FunDraw.Com

wizard of oz sticker
I absolutely LOVE my Xyron sticker machine and have several different sizes.  I used the Xyron 510 and the Laminate/Permanent Sticker cartridge to make the pieces into stickers.

dorothy and wicked witch of west game pieces
I ran the game board through right side up, but rotated all the circle pieces so that they would shine through the gem accents when placed on each of the accent gems.

wizard of oz tic tac toe party game
The foam pieces were 4x6 inches, so I cut them into a 4x4 square.  I finished the game by placing the game board sticker on the front.

wizard of oz bag topper printable
Then I realized that I needed a way to send these home with the kids, so I bagged them into 4x6 inch bags and added a bag topper.

If you want to make these yourself, here is the printable including the bag topper:
wizard of oz game printable with bag topper

and just in case you don't need it, here it is without the bag topper:
wizard of oz game printable
Good luck! May the shoes be ever in your favor...oh wait (wrong movie)..may the shoes be with you...(nope...that's Star Wars...) oh well...Live Long and Prosper.

Earn Money Online: Plink


You know it's hard, and sometimes expensive to throw a good party.  The little things like party favors, cupcakes, decorations, and games all add up after a while.  So sometimes, when a new idea to help you make a little extra "party money" comes along, I try and share it with you.  That's how our "Earn Money Online" Series came to be.  It's been a little while since I shared anything new, but I'm going to try and share a little more to help you as Summertime Party Season swings into gear.


Here's where Plink comes in.  

Plink is a credit card reward type company that allows you to earn points at certain online and brick and mortar retailers such as Taco Bell, Kmart, and Regal Cinemas.  You simply sign up with your credit or debit card and shop as normal at your favorite stores.  For each qualifying purchase (each store has a minimum amount needed to be bought during each transaction), you receive Plink Points which you can turn around and redeem for gift certificates.

To receive the promotional $10 for purchasing that Plink has going on right now, simply sign up with Plink and register a valid credit card with there service.  Then go into your account and add up to 3 different stores to your Plink wallet.  This will allow you to earn rewards at these stores when you shop with them.  When you make a $10 purchase, you will receive 1000 bonus points into your Plink wallet (within 7 days) which you can redeem for a Gift Certificate to Walmart, iTunes, or other great stores.

I admit, I was a little leery to give them access to my banking information at first so I started with an old account that I rarely used and just used that card when I shopped at qualifying stores, but after having been a member for a while now, I have not had any problems with the service so switched to my main bank account where I spend the most money.

The kids are pretty excited since now I don't "whine" quite so much when we go to fast food places to eat (I REALLY HATE FAST FOOD!)  since I know I'm earning gift certificates as we eat out.  This makes them happy since they love Arby's, Taco Bell, and McDonalds almost more than my home cooking.

Check out Plink today and start making your purchases count!

10 Wizard of Oz Birthday Cakes

How about a little eye candy for your Wizard of Oz party?  Here are 10 amazing and fun birthday cakes perfect for Dorothy and friends to celebrate with.

emerald ball cake by pretty cake
1. Emerald Ball Cake by Prettycake.


wizard of oz cake by layers of love
2. Wizard of Oz cake by Layers of Love.

surrender dorothy wizard of oz cake by tara e

Wizard of Oz and Throne Room cake by Mikes Amazing Cakes
4. Wizard of Oz and Throne Room Cake by Mikes Amazing Cakes.

Wizard of Oz Cake by Rebecca L
5. Wizard of Oz cake by Rebecca L.

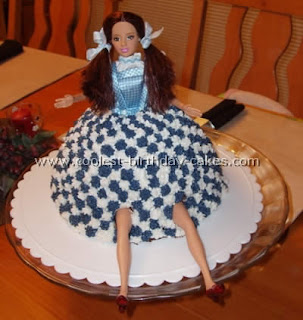
Wizard of Oz Dorothy cake by Missy

Wizard of Oz Tornado Cake by Intricate Icings
7. Wizard of Oz Tornado Cake by Intricate Icings.

Emerald City Wizard of Oz cake by Celelbrate with cake
8. Emerald City Wizard of Oz cake by Celebrate with Cake.

Wizard of Oz Cake by Buschfambly
9. Wizard of Oz cake by Buschfambly.

Wizard of Oz Book Cake by Cake Doctor
10. Wizard of Oz Book Cake by Cake Doctor.

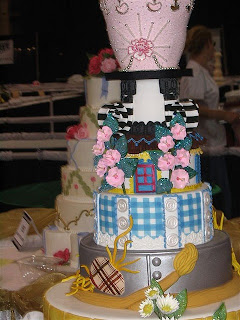
I think I'd better take a few cake decorating classes before I try any of these...but it sure is fun to dream and enjoy the amazing talents of these cake decorators!