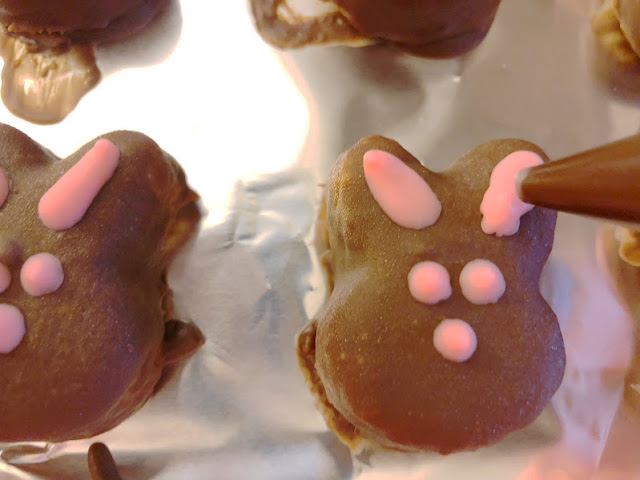
Pop these yummy Easter bunny chocolate covered cheesecake bites in your mouth and you'll be savoring the perfect side of Easter. For what says Easter more than bunnies and chocolate? You'll love how easy and delicious these no bake chocolate cheesecake bites are.
Today I'm sharing one of my favorite spring (or anytime) dessert recipes, along with several other bloggers in a fun Spring Recipe blog hop.
And what says spring more than Easter bunnies and Easter chocolate?
And I've got both in these Easter bunny chocolate covered cheesecake bites.
They are small bites of sweet, lemon cheesecake wrapped in a delicious chocolate shell. Just right for popping into your mouth as your run out to find those Easter eggs.
To make these cheesecake bites, you'll need:
- Easter Bunny Silicone Mold
- 1 lb Cream Cheese
- 2 cups Milk
- 1 small package Lemon Instant pudding
- Chocolate Candy Melts
- Pink Chocolate Candy Melts
- Chocolate Pen
- Wax Paper
Start by mixing cream cheese and 1 cup of milk in a medium mixing bowl. Mix until the cream cheese is completely creamed and mixed into the milk. Add lemon instant pudding and remaining 1 cup of milk. Mix thoroughly.
Pour each silicone hollow with the cheesecake mixture. You will probably have more than enough to fill one whole mold.
You can refrigerate the remainder and make more later, but know the mixture will start to thicken up as it sits.
Freeze silicone mold and cheesecake for at least 2 hours, or until completely firm.
Do not remove bites until ready to use. Then only in small increments as they will start to thaw and become hard to work with. Leave in freezer as long as you can.
Pour chocolate into a microwave proof bowl. Melt chocolate in 2 minute increments on 50 percent power until smooth and creamy.
While cheesecake bites are still hard, quikly dip into the chocolate and cover completely with chocolate. Using a fork, remove bunny bite and tap carefully on side of bowl to remove excess chocolate.
Carefully lay on piece of wax paper to dry. Continue working until all Easter bunny bites are covered in chocolate.
When chocolate is hardened, melt pink chocolate in your Chocolate pen. Use chocolate pen to add ears, eyes, and mouth to your Easter bunny.
Keep your chocolate cheesecake bites in the refrigerator covered until ready to enjoy.
If you are looking for more great Spring recipes, go check out these other party bloggers on this fun Bunny hop.


No comments:
Post a Comment