This post may contain affiliate links. When you click on a link, you are supporting DIY Party Mom, my family, and our blog fun. Thank you for your love and support!

Free Teacher Coloring Candy Bar Wrapper Printable


After the successful (no argument) afternoon when we made our Coloring Personalized Notebooks, I was in a hurry to try again, so we designed up a Teacher gift for the kids' first day of school.

We designed this coloring candy bar wrapper for the kids to color and wrap around a 1.5 ounce Hershey candy bar.

It's as simple as printing the candy bar wrapper and cutting it out.

Enjoy coloring away...

I used some aluminum foil to wrap my Hershey bar so the brown ends aren't shown, then wrapped my candy bar with the printable.

If you aren't in the mood to color, I've also included a printable for you with the original colors.  Because going back to school, doesn't have to be any harder than it already is!

With color...

Without.

Coloring Book Personalized Notebooks for School


It's the Most Wonderful Time Of The Year....Back to school time.
I think I get a strange kind of "high" about this time each year.  I think it's a combination of the cheap school supplies on sale as well as knowing my kids will be going starting a whole new year with new experiences and going to school all day, really excites me.  I love it.

But have you noticed how kids all seem to want the themed notebooks and supplies?  The ones that AREN'T on sale?  And it's like the stores raise the prices on the New Direction, Princess, and Superhero notebooks to make up for the prices on the other supplies.  YIKES!


So we decided to make our own personalized notebooks this year for school.  That way, my kids can get any theme they want as well as an afternoon of coloring.

We started by purchasing a few of the cheap notebooks at Walmart.  Most of the other supplies we had on hand since this is a project I do quite often for gifts.  You might not have these, so you'll need 

2 Binder Clips

Now go ahead and google search for a coloring page with the theme that your kids want.
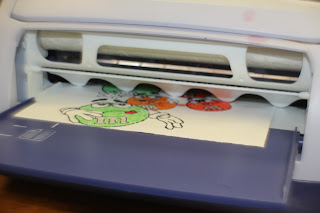
We did one with M&M characters, one with Eeyore, and one with a fun geometric design.

Print out your color page to whatever size that your notebooks are.  Mine were 8 x 10 1/2 inches.  But double check because you don't want it too small.

Go ahead and let your kids color their page.  This should keep them busy for a while, especially if you have a yummy snack to eat while working.  I LOVED having an hour or so of no fighting.

While the kids are quietly coloring, you may want to do this next part, because trust me...it's not something you want to tackle while the kids are underfoot.  It can be a bit frustrating depending upon your type of notebook.

You need to remove the spiral from the paper and notebook.  To do this, you need to unlatch the spiral at the top and bottom of the notebook.  Then slowly "unroll" the spiral up and out of the notebook.  It's easiest if you try to rebend it so it just flows, but not all notebooks are created equal in the ease of this.

By the time you are doing un-spiraling all your notebooks, your kids will probably be done coloring.  Using your laminator (I LOVE my Xyron XRN900  for this with the Lamination Refill.It's a craft essential I couldn't live without), laminate your coloring page.  This will keep them waterproof and semi-durable. (With my kids NOTHING is completely durable!)

Now go ahead and cut out along the edge of the coloring page so the laminate is only on the page.

Now if you have a son that likes to doodle in class or doesn't finish his elaborate design, you can decide not to laminate it and just continue.  This will allow your kids to color their notebook later at their own pace.

Using the front of the original notebook, line up the top with the laminated coloring page underneath.  I like to use binder clips to secure the pages so they don't move around while I'm working.  It's not fun to have to keep re centering your pages.

Using your 1/8-Inch, Circle hole punch, punch holes through the coloring page using the notebook front as a guide.

Remove your binder clips and discard the original notebook front.  Using the coloring page as your new notebook front, line the pages all back up and re-thread the spiral through the front, paper, and back of your notebook.  This is usually a little easier than un-spiraling.

Now you have new themed personalized notebooks for your kids at a cost that won't kill the Back to School mood.

Back to School Bookworm Candy Topper Printable


School is only 2 weeks away here.  A fact that my children are in complete denial over.  I bought a few school supplies last week and came home super excited over the good deals (yea, I get a little excited for a good shopping deal), and my kids practically went into mourning.  I am forbidden to say the "S" word in front of them for the next two weeks or bring home any more "S" supplies.  


To try and help them get over the tragic loss of summer, I am sweetening them up with these cute Candy Bookworms.  Maybe I can remind them of the good things about school...okay, at least one good thing about school...reading.

This printable comes in the normal set with a tag printable and 3 different types of bag toppers.

Simply add some Gummy worms to a bag and top with this cute little bookworm.
It may not make going back to school any easier, but it might make it a little sweeter.


You can get this Bookworm printable HERE in our store.  It's FREE until September 1 when it will go on sale for $1.50.  That should give you enough time to sweeten up your kids for the dreaded Back to School event.  So go grab it NOW if you think you might need the extra help.

10 Cheap Teacher Gifts

My kids aren't rotten...at least to everyone but me.  I'm told they are the most polite, wonderful, sweet, helpful children in the world...when I'm not around.  I don't know why that is.  Maybe because I'm the "MOM".  I think they like me to practice my punishing skills every now and then.  Or at least pretend too, because they all know I'm the biggest push-over ever!

But sometimes, I feel like there "home" selves will kick in and I may need to bribe the teacher at the start of every year.  Here are a few cheap teacher gift ideas that I found to help me.

Color My World Teacher Gift

USB Charger Teacher Gift by The Crafting Chicks.
2. USB Charger Teacher Gift by The Crafting Chicks.

Gardening Teacher Gift by Skip To My Lou.
3. Gardening Teacher Gift by Skip To My Lou.

Mounds of Fun Teacher Gift by Lil Luna.

Hot Fudge Teacher Gift by Brown Paper Packages.
5. Hot Fudge Teacher Gift by Brown Paper Packages.

Time To Relax Teacher Gift  by Landee See, Landee Do.
6. Time To Relax Teacher Gift  by Landee See, Landee Do.

One Smart Cookie Teacher Gift by Crunchy Frugalista.
7. One Smart Cookie Teacher Gift by Crunchy Frugalista.

Chocolates Teacher Gift by Hairy Shoe Fairy.
8. Chocolates Teacher Gift by Hairy Shoe Fairy.

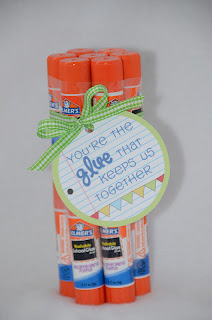
Glue Sticks Teacher Gift by G*Rated

Teacher Can't Live By Apples Alone Teacher Gift.

Back to School Chalkboard S'mores Treats


With the close of summer, there are lots of things that we start to miss....sleeping in, drive in movies, family reunion trips, and s'mores around the campfire.  While planning our Back to School party treats, I saw these fun First Day of School treats from Chrissy's Crafts.

We decided that we weren't ready to abandon our S'mores treats for the school year, so we decided to make these Back to School Chalkboard S'mores.

I started with a box of Honey Graham crackers, a jar of Marshmallow Creme, a few Hershey Candy Bars, and a little bit of white chocolate wafer bits.

To make these, simply snap one of the Graham crackers in half to make two squares.  Then spread the marshmallow creme on the top of each of the sides.

Break one of the chocolate bars in half and place it upside down (the squares are facing down) on the marshmallow creme.

Melt a little bit of the white chocolate wafers in a zip lock back for 30 seconds at 50% power.  Be careful to do this because white chocolate burns easily.  Once the chocolate is melted, snip of the barest edge of the corner...really, the smaller the better for clean lines.  Now use the chocolate "chalk" to write on your S'mores "chalkboard".

I finished these Chalkboard S'mores treats by placing them in a 4x6 inch bag and tieing them with red, yellow, and blue ribbon.

Now we have a little bit of summer to carry us into the new school year.