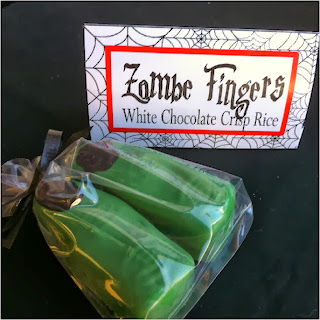
Halloween is all about the Monsters, the candy, and the fun. So why not put all three together for a sweet treat that would be perfect for your Halloween party or as a unique giveaway on Halloween night?
I found this fun finger and bone ice cube tray in the Halloween section at Dollar Tree this week. Originally, I wasn't sure what to do with it, but it was too fun not to buy. So I grabbed it and after watching "Warm Hearts" this week, I knew I had to make some Zombie fingers for my Halloween party table.
Just melt the chocolate in a glass bowl at 50% power in one minute increments until it's nice and smooth. When the chocolate is ready, add the cereal until it looks perfect to you. I added a bunch of crisp rice to mine so that it had a lot of texture.
Add the chocolate and cereal mixture to the finger mold. Normally when working with chocolate and molds, the mold needs to be tapped onto a hard surface to ensure there are no air bubbles in the chocolate which will ruin the surface of the molded chocolate. But since I was making Zombie fingers, I didn't tap the chocolate out and let the air bubbles give the finger a distressed look.
When ready, place the mold in the refrigerator for 5-10 minutes to harden. When they are ready, pop the fingers out. To finish the finger, melt a little bit of Black Candy Melts into a smooth consistency. Use a toothpick, skewer, or food paint brush to paint in the fingernail.


These are so fun! I would love if you would link them up at the Halloween link party going on all month across 10 blogs: http://persialou.blogspot.com/2013/10/owl-wreath-and-halloween-project-parade.html
ReplyDeleteHI Kim! Thanks so much for linking these up! You are today's Dare to Share Feature of the Day. Here is the link to your feature. http://www.pamspartyandpracticaltips.com/2013/10/zombie-finger-treats-feature-of-day.html
ReplyDeleteAwesome! I love spooky & ghoulish at Halloween and your "finger food" is perfect Kim!
ReplyDeleteSo fun!! Featuring you at this weekend's party! Thanks for linkin up to Sunday FUNday!
ReplyDeleteThese are so fun! I love the packaging too. Found you via Sunday Social drop by sometime. Theresa @DearCreatives
ReplyDeleteGreat Idea! Fun and creative! love it! thanks
ReplyDelete