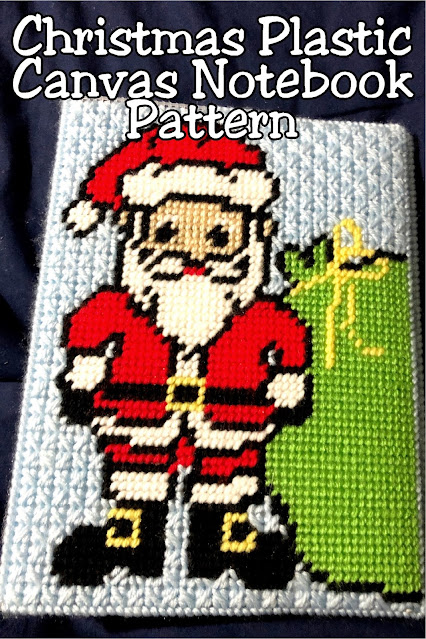
Get started NOW with your Christmas planning with this super cute and easy Christmas planner notebook cover. Made using simple stitches from plastic canvas it's perfect for the beginner and the advanced crafter and will make you WANT to get organized so you can relax this Christmas.
Christmas is only FIVE months away!
While that may seem like a long time, it's not. Not, if you want to be
able to relax and enjoy the month with all it's parties, celebrations, and
time with family.
And since I've started my first ever annual Christmas in July gift idea
extravaganza this month, I'm working to help you be able to relax this
December instead of being all stressed out with gift giving, party planning,
and all the other "To Do"s that the holiday brings.
I'm starting with this
easy Christmas planner plastic canvas notebook pattern.
If you've been around a while, you've noticed that I love to use notebooks to
get organized. And I love the little mini notebooks that you can find at
Walmart. They are the perfect size to carry around to keep me organized
and on top of things.
But I'm not a fan of the plain, boring covers. So I make a bunch of
notebook covers using plastic canvas to make them look good in my house and
office.
To make this notebook cover you'll need:
- 2 sheets 7 count plastic canvas
- yarn in red, black, white, peach, light green, gold, and light blue
- basic plastic canvas skills
- scissors
- 1 needle (unless you are prone to losing them like I am)
The front cover is made from 1 sheet of 7 count plastic canvas. Cut the
canvas into a rectangle that is 51 holes by 63 holes.
Follow pattern to stitch Santa, his bag, and the background.
Cut another piece of canvas that is 51 holes by 63 holes for the back of the
mini notebook.
Stitch this in Leaning Left and Leaning Right Mosiac stitches using light blue
yarn.
To make the spine of the notebook cover, cut a piece of canvas that is 12
holes by 63 holes.
Using black and light blue, stitch the pattern.
Following the direction in the picture above, cut two pieces of canvas in 25
hole by 63 hole rectangles. These are your notebook holders.
Sew one to the backside of the front cover along the outside edge where the
Santa sack is.
Sew the other along the left side of the back cover.
Join the other side of the notebook covers to the spine piece to form a
notebook sleeve. Overcast any remaining edges.
Slide your mini notebook inside for the cutest notebook to keep yourself
organized this Christmas.
Now that you have your notebook cover done, you need to fill it with cute planner pages to get you organized so you have plenty of time to play this
December.
I created a Christmas planner printable that has
over 20 pages of cute planner pages to help you get organized today
so you aren't stressing tomorrow.
Each of these pages are designed so you can print only the pages that
you need and they will fit perfectly inside the mini notebook that you just
created!
Each page comes in four different versions in both JPG and PDF formats.
That way, no matter if you like your pages printed on both the front and back
to save paper, or you like only one graphic per page, you can print what you
need.
Now that I have my Christmas planner notebook cover done, I am going to fill
it so I can start gathering addresses for my Christmas cards and gathering
ideas for Christmas presents for everyone on my list. Won't you join me
for a more relaxed Christmas this December?
And then be sure to
sign up for the first of our Christmas candy gifts this Christmas in July
with our Teacher Candy bar wrapper. That way you won't miss any of our 12 days of gift ideas as well as
any other fun printables and party ideas we share!


No comments:
Post a Comment