I'm having all kinds of computer issues today, so we are just going to get down to the fun. I can't wait to see what you've been able to do while I'm sitting hear yelling, pleading, and sobbing into my computer screen!
This post may contain affiliate links. When you click on a link, you are supporting DIY Party Mom, my family, and our blog fun. Thank you for your love and support!
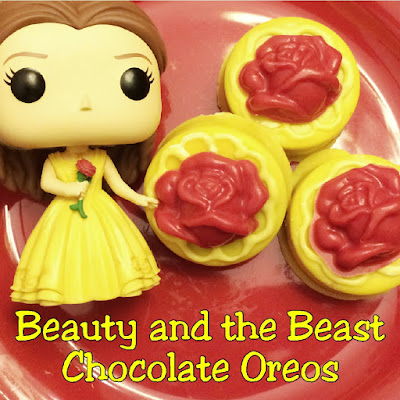
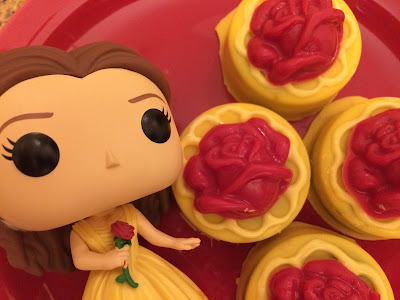
Beauty and the Beast Chocolate Covered Oreos
Beauty and the Beast chocolate covered Oreo cookies. What a fun idea for a Beauty and the Beast birthday party or for a treat after watching the new movie! I think the girls would LOVE these yummy chocolate cookies to celebrate with.
I don't know if you've noticed or not, but I'm a little excited about the new Beauty and the Beast movie coming out this weekend. I've shared a few crafts lately as I built up the excitement with my girlfriends to go see it. (And now my boys want to go too! Maybe I'll get to see it twice! Yea!!)I shared some Beauty and the Beast mini candy bar wrappers as this month's email freebie. I purchased the new Funko Pop Belle and Beast figurines to keep Chip the Teacup company. (He is still one of my favorite DIY projects ever.) And today, I created some chocolate covered Oreos that I think Belle would swoon over.
And like most of the crafts I like to share, these chocolate covered Oreos are super easy and yummy! I think they would make such a sweet dessert for a Beauty and the Beast party or as a post movie treat. (Because after having movie popcorn, I'm always craving chocolate. Am I the only one?)
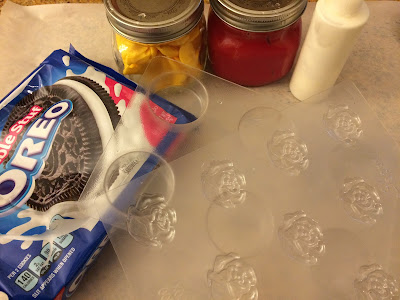
- Double Stuffed Oreos
- Yellow Chocolate Melts
- Red Chocolate Melts
- Spinningleaf Chocolate Oreo Mold
- Bite Sized Rose chocolate mold
- Mini Squeeze Bottle
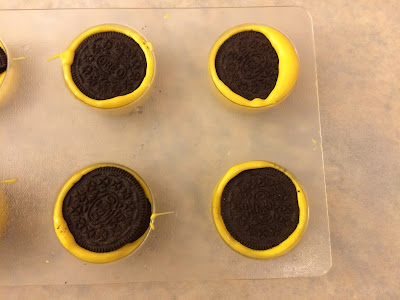
Start by melting your Yellow Chocolate Melts in a microwave or double boiler. Once they are nice and smooth, add a little bit to the bottom of your Spinningleaf Chocolate Oreo Mold. I love this mold because my Oreos come out so smooth and pretty every time. So much less stress and work than hand dipping them.
Add your Oreo on top of the chocolate and then add a little more chocolate on top of the cookie. Tap the mold on the counter carefully to even out the chocolate and release any air bubbles. Once your cookies are ready, add them to the refrigerator for 20 minutes to a half hour to set.
While they cookies are setting, melt your Red Chocolate Melts and fill your Bite Sized Rose chocolate mold with red chocolate. Once again tap out on the counter to release any air bubbles and get your chocolate smooth. Refrigerate the roses while your Oreos are setting.
While the chocolate is still melted, add a little bit of your Yellow Chocolate Melts to a Mini Squeeze Bottle. Make sure your chocolate is nice and smooth. If you need it a little thinner to flow, add a small bit of vegetable oil or shortening to your chocolate and mix until smooth and thin enough to flow nicely.
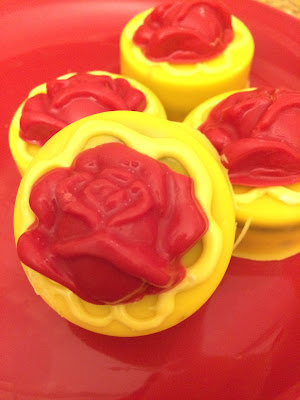
When your Oreos and roses are set, use your yellow chocolate squeeze bottle to pipe a flower shape to resemble the bottom of Belle's dress on the outside edge of the chocolate covered Oreo. Allow the dress piping to harden for a few seconds as you do the other Oreos.
Add a large drop of yellow chocolate to the center of the Oreo and place one of the roses on top to secure it to the chocolate covered cookie. Allow to harden as you repeat the process on the other cookies.
Enjoy your cookies as you enjoy the new Beauty and the Beast movie!
Are you planning to go see the new movie this weekend?
You are my Pot of Gold St Patricks Day Tag with Golden Oreos
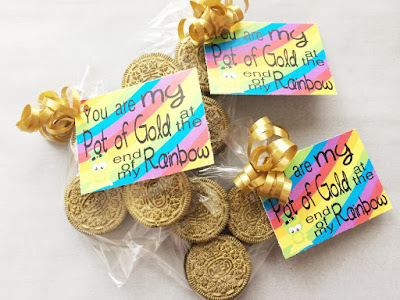
Celebrate St Patrick's day with your Pot of Gold and these cute, easy, cheap St Patrick's day bag toppers. You can make yummy gold coins from Oreo Cookies and add this printable bag topper for a great St Patrick's day gift that everyone will be lucky to receive!
With St Patrick's Day this weekend, I'm working on some fun party ideas for my family and friends. One of the treats we'll have at our St Patrick's day party are these super cute Pot of Gold St Patrick's Day printable tags and golden Oreo cookies.When you spray paint the Oreos, you get yummy little golden coins that are much better than those chocolate coins that you pay an arm and a leg for. (At least that's what my kids tell me.)
Aren't they super cute? These would make a fun giveaway for a class party or to each of your little "leprechauns" on St Patrick's Day.
The tag reads "You are my Pot of Gold at the end of my Rainbow"
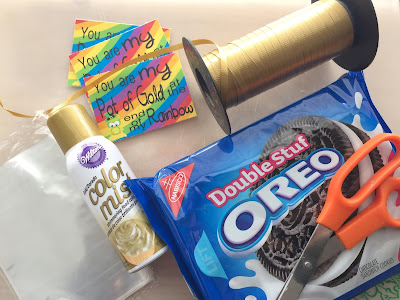
To make these Golden Oreos with Bag Toppers
- Pot of Gold Tag Printable (at the bottom of the page)
- Oreo Cookies
- Gold Color Mist
- Gold Curling Ribbon
- Bags
- Scissors
- Hole Punch
The great thing about this project, is that right now, if you have the Favado or Flipp app, you can find a store nearby you that has Oreos on sale! Talk about a win!
But then if you also have the Ibotta app, you can purchase two bags of Oreo cookies and get $1.00 back! Even better win! (Just thought I'd mention that if you're like me and need to save every penny possible when throwing a party or buying food for the bottom less pits we call kids.)
But then if you also have the Ibotta app, you can purchase two bags of Oreo cookies and get $1.00 back! Even better win! (Just thought I'd mention that if you're like me and need to save every penny possible when throwing a party or buying food for the bottom less pits we call kids.)
Once you have your Oreos, lay them out (I used a piece of Parchment) and spray the Color Mist Gold food die over the cookies. Now they do dry really fast, but be sure to give them a minute before you flip the cookies over to spray the other side of the Oreos.
Once the Oreos are dry, place them in a bag and add the topper tags at the bottom of the page. Super easy, cheap, and yummy. You really will think you hit the pot of Gold!
Here's the St Patrick's Day bag topper printable:
What are you planning to do to celebrate St Patrick's day? Check out more ideas on our St Patrick's Day pinterest board.
3 Dr Seuss Desserts and Dare to Share Saturday
It's been such a fun week for me. I'm finally getting back into crafting and parties. I have so many fun ides coming up that I've been busy crafting away.
But I'm always sad when I miss an opportunity to have a little extra party fun. I completely missed Dr. Seuss' birthday this month. What?!?!? It's not like I didn't realize it was there, I just got so busy, that I forgot to celebrate it with my kids.
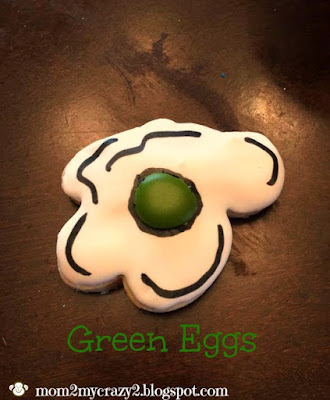
I think that Dr. Seuss would be such a fun dinner party theme. I could totally see Truffula trees all over the table, and green eggs and ham for dinner, and the Cat in the Hat striped decorations. Maybe we'll do a family dinner party later this month with that theme. After all, in our family, birthday's usually last the whole month long...after all...why not?
If you missed it, you guys shared some AWESOME Dr Seuss desserts at last week's Dare to Share Saturday. If you want to have a little (late) Dr Seuss fun, be sure to check out these great features and then enjoy a little bit of Dr Seuss fun for dessert tonight.
I can't wait to see what you've been up to this week!
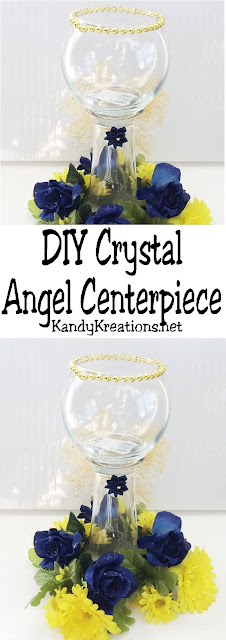
DIY Crystal Angel Centerpiece
Do you need a quick, cheap, easy, but elegant, beautiful centerpiece for your next party? This angel centerpiece is perfect and can be made in just a few minutes for a spectacular addition to your table.
One of the projects that I'm currently working on is a birthday dinner for all the sisters in our church. We are celebrating the 175th birthday of our women's organization and decided to go with an angel and flower theme.
In setting up the tables, we knew we needed to come up with a simple, easy, yet beautiful diy centerpiece for all the dinner tables.
We created these beautiful angels for each of the tables. The colors of our women's organization are blue and gold, so that's the color scheme. I think they are going to look so beautiful on each of the tables and add a little bit of elegance to our dinner.
If you need a quick and easy DIY angel centerpiece, these are SUPER easy to make.
- Tall vase (mine was from the glass section at Dollar Tree)
- Circular globe vase (also from Dollar Tree in the candle section)
- 6 inch wide tulle
- beads (mine were from Mardi Gras beads I found at Walmart)
- small flowers (find mine at Jo-Ann Fabrics)
- flowers in green vine
- coordinating flowers free of vine
- glue gun
Start by securely gluing your globe to the upside down bottom of the tall vase. This creates the body of the angel.
Using several feet of tulle, tie a bow and glue it to the back of your angel. This bow is about 2 feet in length, so the more length in your bow, the larger the angel's wings are going to be.
On the opposite side of the bow, glue your small flower to the front of the angel.
Measure the top of your globe vase and cut a piece of your beads the same size. Add a little bit of glue to the last bead and secure it to the other end to create a small circle. The halo should be the perfect size to sit on top of the angel's head.
Using the flowers on the vine, wrap around the base of your angel and trim. Secure the length into a circle. Add the free flowers in the holes of the flower base to create a beautiful flowered base for your angel center piece.
Ta-dah! You're done and have a quick and easy but super beautiful and elegant Angel Centerpiece for your next party.
And if you have a son who can't tell what the centerpiece is supposed to be, you can always add a face to your angel! (Ugh....I thought I raised him better. *grin*)
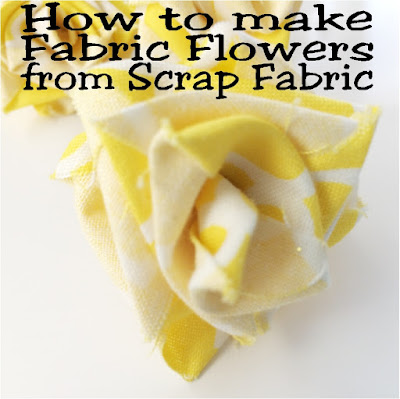
Make your own Fabric Flowers from Scrap Fabric
Can't find the flowers you need in your party colors? Make your own fabric flowers in a few easy steps out of scrap fabric you already have at home. These fabric roses are great as Beauty and the Beast roses, Bachlorette party roses, or as the yellow rose of Texas for your Cowgirl party. The possibilities are endless!
It seems a lot of the parties that I've been working on lately have needed flowers. Although I live in a much bigger town than I did six months ago, I'm still having trouble finding flowers in colors matching my party color palette.
Am I the only one that wants to take a can of spray paint to just about everything they craft?
Since I decided that probably wouldn't work for my needs, I have been trying to find a way to make fabric flowers that I could DIY. It took some time but I finally discovered how to make fabric flowers from scrap fabric. (Because scrap fabric is so much cheaper than buying more!)
The best thing about these flowers is that they can be made in any color, so you'll always have the right colored flowers for your needs. You can also make them in any size. The bigger the width of your fabric scrap and the longer your fabric, the larger the flower is going to be. Just play around with it to get the perfect size fabric flower.
To make your own fabric flowers, you'll need:
- scrap fabric (mine is cut into one inch widths and 21 inch lengths)
- tweezers
- scissors
- floral ribbon
- floral wire
- iron
Start by folding your fabric into a right angle turn about 1 inch from the end of your fabric scrap. You will want the turn to be tight and crisp, so fold it sharp and then run your iron quickly over the edge to tighten the crease.
Turn your fabric in a counter clock wise direction and turn down your fabric scrap into another right turn. You'll end up with a point. If your fabric isn't double sided, you'll have alternating color and back side showing. Crease the edges down again with your iron.
Keep turning and creasing your fabric until you are down to about two inches left on your scrap.
Once you are down to the last two inches of fabric, insert a pair of tweezers from the backside of your fabric square up through to the top front. Grab the end of the two inches of fabric and pull it through the square and down to the back.
Continue to pull the two inches of fabric down through the rose until you end up with a tight rose bud shape at the top front of your rose.
While holding on to the back end of the rose, start turning the center rose bud clock wise to rotate the fabric flower into a rose shape.
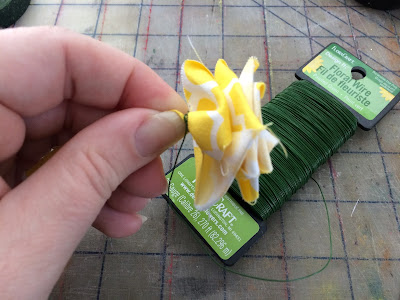
Once your scrap fabric resembles a rose, take a piece of floral wire and wrap it around the base of your flower in the back. Make sure it's tight to allow the flower to keep it's shape. If you want the base of the flower to be bendable to resemble a boutineer, keep wrapping the wire down over the excess fabric. This will allow that fabric to bend into any shape you need.
Finish the flower off by wrapping the base of your rose and floral wire with floral tape. Wrap securely and completely all the way down the stem to cover all the fabric.
Make a bunch of these fabric flowers in red so you will have the Beauty and the Beast rose at your movie viewing party. Or make some yellow fabric flowers for a cowboy party and the yellow rose of Texas. Or enjoy a Bachlorette themed party with your girlfriends and give everyone a rose at the end of the night. The possibilities are endless!
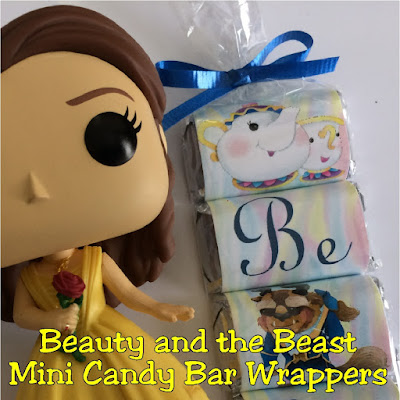
Beauty and the Beast Mini Candy Bar Wrappers
Looking for a sweet party favor for your Beauty and the Beast party? These mini candy bar wrappers are beautiful and super easy to create a great party treat, favor, or invitation when you go see the new Beauty and the Beast movie or celebrate at your Beauty and the Beast birthday party.
3 St Patricks Day Decorations and Dare to Share Saturday
I am finally up off bed rest and (knock on wood) feeling better. So we've been celebrating with some fun family activities this week, including a trip to see the Lego Batman movie which we absolutely LOVED! We've been quoting movie lines and "pew pew"ing all over the house.
So of course, we had to have a little Batman fun and made a printable Batman party favor box to share with you this week. Don't forget to run over and grab it.
We've also started decorating for St Patricks day. I shared some St Patty's day iPhone wall papers to decorate with so be sure to save your favorite. That little bear makes me so happy every time I open my phone.
You guys have been busy decorating in green too. I was so excited to see all the St Patricks day party and decorations you shared at last week's Dare to Share Saturday. If you missed them, be sure to check out these three features.
I can't wait to see what you've been up to this week!
Printable Batman Party Favor Box
Enjoy a little fun at your Batman party with this printable Lego Batman party favor box. These boxes are quick and easy to print up and best of all, its a free printable to make your party super.
We were able to go see the Lego Batman movie this past week. Let me tell you, if you haven't seen it yet, get in your Batmobile and GO!
The movie was highly enjoyable for both adults and kids and we've been quoting movie lines for days now.
When we came home, we immediately started planning a Batman party. This printable party favor box was the first favor that we came up with. It was super easy to make, especially when we grabbed some black cardstock.
To make your own Batman Box, save the printable at the bottom of the page. You need to click on it to open in a new page and then right click to save to your computer. You can choose from the ink saving blank Batman Box which can be printed on to black cardstock or the colored Batman box if you can't find any black cardstock.
Once that is done, grab some black cardstock and print out the box. The box outline will be faint but visible. Cut around the outside of the box. Then score all the inside lines so the box folds easily.
Cut out and score the Bat Ears. Be sure to be very careful when cutting the center so that you don't trim it and instead have both sides to make the ears 3D.
Using your scored sides to help, fold the box into a square and glue the edges to secure.
Carefully, cut out Batman's ears. Be sure to not snip through the center of the two triangles so you can have 3D ears on your box party favor. Score along the inner lines so they fold easily.
Fold the box along the scored edges. Glue the outermost triangle edge to the upper triangle to make a triangle teepee shaped box. Repeat on the other side.
Glue the two ears to the top of the box above the square with the face guides.
Glue the mouth and eyes in the appropriate spots on the Batman Box. Fill the box with yummy Lego candies or sweet treats.
Get your printables here:
 |  |  |
If you loved this party favor, be sure to check out my other Lego and Batman party favors here:
 Superhero Bingo Printable Game |  Personalized Lego Name Plate |  Character Candy Bar Wrapper eBook |
Subscribe to:
Posts (Atom)


