Wow. I am so in LOVE with these fall floral arrangements. They will be perfect for my fall festival wall decorations at our Halloween party...and they were so easy and cheap to make. I'm going to make them for every room in my house!
I showed you earlier this week some of the ideas I gathered for fall wreaths for our church's fall festival. Even with keeping them simple and cheap, I decided I needed to have some other decorations on the walls.
So I decided to try and go with fall flower arrangements.
If I do a wreath, and then further down the wall, a fall flower arrangement, and then another wreath, and then another fall floral arrangement, I think I can get some of the pretty fall decorations and theme that I'm working for without too much expense.
Especially if I add some pennant banners and lights to tie the wreaths and arrangements together. (More on that next week so stay tunedt!)
But I did want to show you how beautiful and easy these floral arrangements were to make. I am in LOVE! I think I've decided I'm going to make some to frame my bed and match my Fairy Tale décor in my bedroom next. It will certainly add some beauty to the Thomas Kinkade Disney pictures that I have in there now.
But for the fall festival, these floral arrangements will be perfect, especially since Hobby Lobby has their floral décor 40% off this week.
To make your fall floral wall decoration, you'll need:
- Fall floral arrangement (I got mine for $5.00 at Walmart)
- Ribbon
- 8 1/2 x 11 inch Colored card stock
- Glue gun and glue or strong tape
- Wire cutters
- Scissors or Paper Trimmer
Start by marking the back of your card stock into halves. You'll need to know where the middle of the paper is on each of the sides of the paper. I drew a big + sign on the back to make it easy.
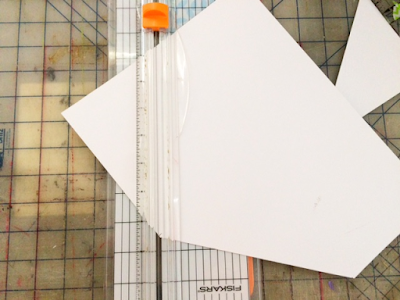
Cut off the corner of the bottom of your paper by lining up your paper at the horizontal cross mark on the side of the page and the vertical cross mark on the bottom of the page.
Using your center line, fold the edges into the center (much like you would for a paper airplane.) The center pieces will touch.
Add a bunch of glue to one side of the back of your card stock and lay the other side over on top so the back two edges (the colored side shown in the picture above) lay on top of each other.
Turn the paper vase over and use a pencil or something to push the glue together and help it seal.
Using matching ribbon, tie a bow and glue it to the top front of your paper vase.
You will want to check on the size of yours, but all my floral arrangements were too tall for the vase that I created, so I used a wire cutter to cut off the bottom edge of the arrangement. Since I have no skill in floral arranging, I kept the upper part of the arrangement together.
Simply slide the arrangement down inside the vase and enjoy.
To hang my floral arrangement vases, I took out the flowers and stuck a sturdy thumb tack into the backside of the vase into the wall. Then I added the flowers back in and the weight hung without a problem.
I admit that I am super excited with how beautiful these arrangements turned out and how easy they were to make. The hardest part was cutting the end of the floral arrangement off and it took me a total of 5 minutes to make each one.
I think they will be perfect for the walls at our Fall Festival! (And in my bedroom!)


No comments:
Post a Comment