Let your guests fly to Hogwarts with this Harry Potter flying car photo booth during your next Harry Potter birthday party. Your guests will LOVE this fun and magical memory.
This post may contain affiliate links. When you click on a link, you are supporting DIY Party Mom, my family, and our blog fun. Thank you for your love and support!
Showing posts with label photo booth. Show all posts
Showing posts with label photo booth. Show all posts
Lots of Fun Harry Potter Party Games
Find lots of fun Harry Potter party games for your next party. There are great printable games, diy games, and games straight from the Harry Potter movies to give an authentic and fun feel to your Harry Potter party.
Make Everyday Celebrations with your Family May Photo a Day
Make and remember the Everyday Celebrations in your family with a fun photo a day calendar. This calendar will help you find the special moments in your life that you'll be glad you captured in ten years!
How to make a Galilee Bible School Photo Booth
This weekend the youth in our church had a Youth Conference with all the kids in the surrounding area. The theme of the conference was Return to Galilee
.
The conference was designed to take the youth to a "wedding feast" in Galilee at about the time of Christ's death. We set up a series of shops for the kids to enjoy the town square before the feast.
We had an Oil shop where the kids learned about how olives were pressed. We had a Lamp shop where the kids used clay to make lamps. We had a bread store where they could taste pita breads of all types.
My job was to create a photo booth for the kids to dress up in period clothing and take pictures.
I admit, it was super difficult for me to figure out where I wanted to go with this. I originally wanted to make a large backdrop with the city in the distance, but ultimately decided against it since I wanted the kids to fill up close and personal in the booth.
I ended up going with a city wall using the castle backdrop that I made earlier this year. I dressed it up using a tall vase and some "weeds" from my front yard. Behind the backdrop, I hung a black sheet to disguise the wall behind the booth.
The clothing was a little more difficult to figure out. I only had a budget of $20. So Drama Queen and I went down to Goodwill and bought a bunch of brown, blue, tan, white, and colorful bed sheets. We then filled up a bag of fabric from their fabric table and walked out the door within our budget.
We ended up cutting the fabric in to three different types of clothing. We cut long strips to use as the front of their robes. To these, we sewed ribbon at the top to tie around the back of the neck.
On top of these, we cut out robes with arm holes. This allowed us to mix and match the pieces to get different looks.
For the girls, we cut and sewed strips of fabric into infinity type scarfs. These allowed us to place them over the girls' heads and up and over. The boys got long strips of fabric to use with Dollar Store headbands to complete their look (we already had these.)
This allowed us to get lots of looks for very little money. The kids had a ball dressing up and some didn't want to take off their outfits when it was over.
Wonderland Photo Booth Printables
I totally LOVE the Photo Booth trend in parties right now. So I had to
add one to our Alice in Wonderland birthday party tomorrow.
There are many different photo booth props that you can purchase for
a Wonderland theme. These are the ones that I found on Etsy:
It's nice when you are in a time crunch to just be able to go and buy them
already made, but we all know that I never seem to go the easy way. So I
searched out a few of the characters and photo shopped their hats and faces,
or designed a few of my own if I couldn't find a good picture.
So that you don't have to do that...I'm sharing the printables that I plan to
use. Just print them out on card stock and attach to a dowel or
shishkabob stick.
Cheshire Grin
Mad Hatter Hat
Queen of Hearts Crown

White Rabbit face.
(Although, I admit, it looks more like the rabbit from the cartoon Foster's
Imaginary Friends if you ask me....oh well.)
I am also going to use the glasses and mustaches from the
Little Chef Party
photo booth. You can find them
HERE.
Find more Alice in Wonderland Party Ideas here:
Chef Party Luncheon
Despite "Mini-me" being home sick today with the continuation of his asthma flaring up and yesterday's sickness, today was the party. He was feeling well enough this morning to allow us to run to the store to get the last minute fixins.
To start off I used red tablecloths that I bought from Walmart clearance section at Christmas time.
For the place settings, I used the chalkboard charger I made HERE, a white dinner plate from my kitchen cupboard, and a red dessert/salad plate I purchased from Big Lots. The napkin rings were the set that I made HERE and I just printed out a red with white polka dot strip of paper to wrap around and cordinate.
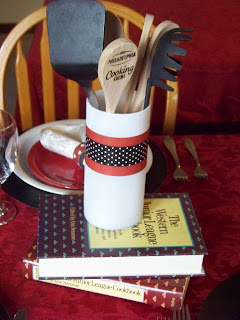
For the centerpiece area, I used recipe books from my extensive and never used collection. On top I used a vase with a strip of cordinating paper around the outside. I looked EVERYWHERE to find white vases and couldn't find any, so I ended up making these. Inside the vases, I placed wooden and black kitchen spoons and utensils as decoration. I used 2 of these on each end of the dinner table.
In the very center of the table, I used a cupcake display tray that I made. It has a white bowl on a black base. Inside the bowl, I placed a bed of romain lettuce with various peppers and tomatoes. It turned out really nice in person!

Because we were moms, we had several small kids at the party too. I didn't want them to feel like they had to sit on their mother's lap the whole time, so I made a kids table too. (I just forgot to take a picture.)
I took a board and placed it over the ottoman in my living room. Then I covered it with a matching tablecloth. This allowed the kids to stand and eat at a table that was just their size. (I know my kids never like to sit still to eat, so this allowed them to graze on their lunches while they played.)
I set up a huge table for the pot luck food to be placed on.
Behind the table I used a black sheet table cloth (my favorite you know) as a backdrop. In the center of the backdrop, I hung the banner sign that I made HERE with "yummy" written on it.
Behind the table I used a black sheet table cloth (my favorite you know) as a backdrop. In the center of the backdrop, I hung the banner sign that I made HERE with "yummy" written on it.
Although I had plates for the moms, I needed them for the kids too. So I used some divided plates that we use when we go to picnics in the summer. They were sturdy and allowed the kids to section their food.
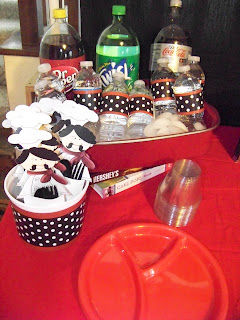
I also used the printable that I shared HERE for silverware for each of the kids. Inside I put a fork and a spoon. Behind that I put some water bottles and soda inside a bed of ice which was sitting in our Lasagna pan. The pan was sitting on more cookbooks for height and decoration.
The dessert table was smaller than most of mine because I didn't want it to be the center of attention. I wanted that to go to the pot luck food table, since this was where everyone else would shine.
This table was a white bedsheet tablecloth with a piece of black fabric from my stash placed on top.
In the front, I hung the "sweets" banner that I made HERE.
For the treats, I made some bite sized Sugar Cookies,
Chocolate Covered oreos with our new white polka dot design,
Cake balls (placed on recipe books for height),
red M&Ms in chocolate bowls,
and chocolate frosted fudge brownies.

One of my favorite parts of the dessert table is the small chalkboard menu cards that I placed beside each dish describing what it was. These turned out cute and were easy to make!
I did manage to finally finish the party favors too.
I bought oven mitts from dollar tree and inside each I put all the goodies that Philly creme cheese and House party sent me as well as a 4x6 photo book for recipes.
Lastly, we had a table to sit the props on for the Photo booth I made HERE.
I used the same jar that I made for the dinner table and a larger chalkboard sign for directions.
Then the kids had a lot of fun!
And so did the moms!
How To Make A Photo Booth Backdrop
Yesterday I shared some amazing printables from fellow bloggers for you to make some props for a photo booth at your next party. It dawned on me as I was cutting all the mustaches and glasses out, that I probably should share how I made my actual photo booth with you too. This way you can make everything you need for a great party activity!
To start, you need to decide if you want a 3 sided photo booth, or just a wall backdrop. I chose to do just a backdrop since this would allow me to fit a bunch of people into my photo booth at one time. It also allows me to use my backdrop for other parties in the future since this is the same idea that I use for my table scape backdrops.
Once you have decided that, decide on how wide you want your backdrop.
For my dessert tables capes, I have made it slightly larger than an 8 foot table. I didn't want my photo booth that big, so I went with 5 feet wide.
The reason I picked this width was because it allowed me to get 2 sides out of one long PVC pipe. Plus, it's the perfect size to allow you to use a cheap Walmart twin size bed sheet for a back drop. (Yes, I use those for EVERYTHING! You just can't beat the price.)
To start you need three 1/2 inch PVC pipes. Mine came in 10 foot lengths. (Not sure if there are other sizes, but this was perfect.) You also need 4 T-shaped joints and 2 elbow joints.
Cut your PVC pipe into:
Two 5-foot sections
Two 4-foot sections
Two 3-foot sections
Four 1-foot sections
You'll be left with two 1 foot sections, so you can either make your 1 foot sections into 1 1/2 foot sections, or if you're lucky you can find a 5 point PVC pipe joint (my store didn't have any.)
Once you have your pieces cut, it's easiest to assemble the piece on the ground and then lift it up. Just be sure that your joints are secure so it doesn't fall apart as you lift.
Hopefully it's pretty simple to understand.
Just insert the poles into the joints. Be sure to push them in securely so it won't all fall apart!
Just insert the poles into the joints. Be sure to push them in securely so it won't all fall apart!
Once you have it up, your Walmart bed sheet will fit perfectly across the sides and bottom. I like to just pin my sheets on so I can change them for different occasions and use my sheets for different purposes. But if you want, you can sew a sleeve on the top so your sheet will hang nicely.
Just be sure to iron the sheet before you take pictures!
What's Cookin' Photo Booth
I have been looking for a way to use the photo booth idea in any of my parties. It really hasn't worked out yet, that I can do it. But this chef party will work perfect if I can get my wacky friends to participate! I'm pretty stoked about it.
But, I'm a cheapy and hate to spend money on something I could do myself if I could find the right clip art...so I haven't purchased any of the cute photo booth props around the web. Instead, I've been looking for props that I can use in the booth that are cheap or free.
In case you are the same way, I found this download printable for mustaches at Crowded Teeth.
AWESOME!
Ruffled has some templates for photo booth props. You can use them to make your own.
Catch My Party has several fun printables for you to download and print.
Check out how to make your own Photobooth Backdrop HERE.
Subscribe to:
Posts (Atom)


