This post may contain affiliate links. When you click on a link, you are supporting DIY Party Mom, my family, and our blog fun. Thank you for your love and support!

Halloween Subway Art Free Printable

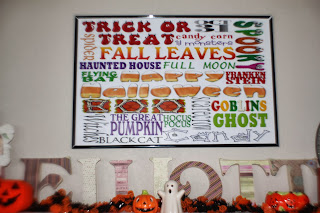
Halloween Subway Art Printable by Kims Kandy Kreations

I love fun fonts, almost as much as I love Halloween.  So when the chance comes to put the two together, I am in Heaven.  The Subway art trend is perfect for great Halloween fonts and perfect for my Halloween mantel.

It's such an easy decoration idea too.  You can make it in a simple 8x10 frame or you can upsize it to a 20x30 frame perfect for hanging over the fireplace.

Here is the Halloween subway art printable for you to make:
Halloween Subway Art Printable

Have fun and enjoy the fonts of the Halloween season!

Halloween Fall Mantel with Subway Art Printable

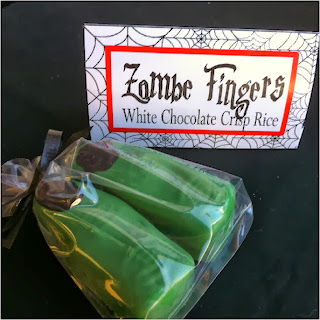
Zombie Fingers Chocolate Crisp Rice Halloween Treat


Halloween is all about the Monsters, the candy, and the fun.  So why not put all three together for a sweet treat that would be perfect for your Halloween party or as a unique giveaway on Halloween night?


I found this fun finger and bone ice cube tray in the Halloween section at Dollar Tree this week.  Originally, I wasn't sure what to do with it, but it was too fun not to buy.  So I grabbed it and after watching "Warm Hearts" this week, I knew I had to make some Zombie fingers for my Halloween party table.


It was pretty easy to start with some Dark Green Candy Melts and crisp rice cereal.  I liked adding the rice cereal to it since it gave the fingers some texture and looked a little like rotting flesh through the chocolate.

Just melt the chocolate in a glass bowl at 50% power in one minute increments until it's nice and smooth.  When the chocolate is ready, add the cereal until it looks perfect to you.  I added a bunch of crisp rice to mine so that it had a lot of texture.


Add the chocolate and cereal mixture to the finger mold.  Normally when working with chocolate and molds, the mold needs to be tapped onto a hard surface to ensure there are no air bubbles in the chocolate which will ruin the surface of the molded chocolate.  But since I was making Zombie fingers, I didn't tap the chocolate out and let the air bubbles give the finger a distressed look.

When ready, place the mold in the refrigerator for 5-10 minutes to harden.  When they are ready, pop the fingers out. To finish the finger, melt a little bit of Black Candy Melts into a smooth consistency.  Use a toothpick, skewer, or food paint brush to paint in the fingernail.


Your Zombie fingers can be placed on a plate to serve with a Spider Halloween table card explaining what the delectable treats are or they can be bagged up with a Zombie Finger Candy Topper like we did here.  After all, serving the Halloween treats with a creative name is almost as fun as eating the candy itself!

Easy Mummy Halloween Door Decoration

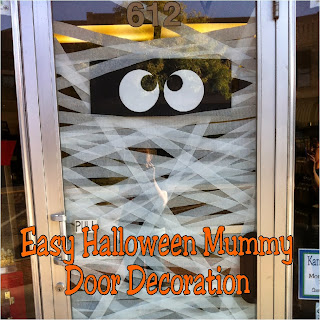
 Easy Halloween Mummy Door Decoration

Are you looking for an easy Halloween door decoration that has a lot of WOW factor?  This easy mummy door decoration is a great way to stop visitors and have them coming inside.

And did I mention that it's super easy?

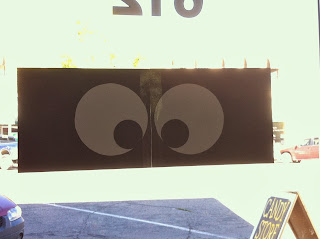
Black Construction Paper Eye Balls

My door is a pretty big glass door, and I wanted my mummy to be seen on both sides.  So I cut out 4 large circles using a large bowl as a template.  Then I cut 4 3-inch circles out of black card stock.

Using 2 sheets of black card stock, I lined up my eyes to give a cute face.  On one side of the card stock, I put the eyes looking up and the other side, they are looking down.  

Putting together an easy Mummy door decoration

I then taped the black cardstock to the upper 1/3 of my door.  I ran the tape down the center of the eyes to secure the face together and allow me to wrap around giving more of a mummy feel.

Use crepe paper fro Mummy door decoration

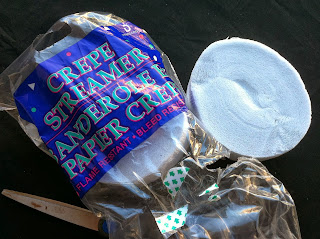
This part took a little bit of time, but I used a package of Crepe paper from Dollar Tree and just wound the streamers around the door from one side to the other.  I only did this on the inside of the door to protect it from the elements or destructive people.

When I was done, I ran a long piece of packing tape around the edge of the door to keep the streamers in place and protected.  It's optional on your end, it just depends on how much traffic your door will get.

Halloween Mummy Door Decoration
Now I have a super cute Mummy to greet visitors to the candy store.  I have already had several people stop in to tell me how much they like him, so it's been a total success!

And I have to admit, I think I'm in love with him.  He's just too cute!

Halloween Sweets, Treats, and Peeps Party Shopping Ideas

Halloween Party Shopping Ideas

Can I tell you how much I absolutely LOVE Halloween?  It is probably my favorite holiday of all.  Which is really funny if you consider that I hate to be scared.  I'm so bad that I have nightmares from walking through rooms with horror shows on.  But Halloween is so much fun.

I love the colors and the sparkle and the fun side of Halloween.  Not to mention the chance to eat more sweets and treats.

To kick of this month, I wanted to share some fun Halloween decorations, treats, and party favors that I found from the small business shops on Etsy.  Hopefully this will kick start your Halloween fun too!


Halloween Party ceramic Skul...
$100

4 Poisoned Apple Caramel App...
$26

Halloween Party Crackers - W...
$6.75

Halloween SALE - Halloween P...
$9.99

Halloween Decoration, Hallow...
$18.99

Vintage Halloween Party Cand...
$2.25

Jack O Lantern Halloween Dec...
$20

3 DIY Halloween Favor Box Ki...
$7.95

Halloween Mason Jar Decorati...
$28

Bloody Zombie Monster Hand C...
$15

50 Halloween Party Straws, S...
$8

Personalized Chalkboard Witc...
$10.5

Printable Halloween Party Fa...
$5

PRINTABLE- Halloween Mini Ca...
$5.5

Halloween Party Favor Boxes ...
$10

printable Halloween party ba...
$5.99

Chocolate Covered Bacon Denver Bronco Gift Box

Chocolate Covered Bacon Denver Bronco Gift Box

Are you going to a tailgating or football viewing party this weekend?  Do you want to take a host or hostess gift that's unique, memorable, and yummy?  Then I have the answer for you!

How about Chocolate covered bacon in a custom gift box?

I know, I know...you can thank me later.

Bacon Gift Box Template
I started with a box template that I designed up.  It measures 10 x 4.5 inches.  I imported it into Gimp and filled in the template like I did with the alphabet letters to give me a custom designed box.

Denver Bronco Chocolate Covered Bacon Box Lid
After printing the box lid, I cut around the edges and scored the lines.

Chocolate Covered Bacon Gift Box
You will need to cut one side of the end tabs to create sides to fold and glue into the inside of the box.

Denver Bronco football Chocolate Covered Bacon Gift Box
Then I printed the original box template at 98% size.  This gave me the bottom of the box to put together.

Chocolate Covered Bacon
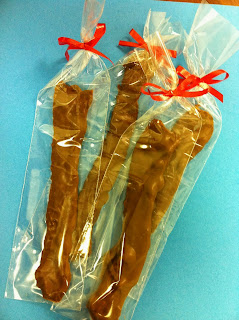
I made up some chocolate covered bacon to go inside the box.  This was almost too easy to show you how to do.  It was a matter of cooking the bacon and then dipping it into melted chocolate pieces.  Let the bacon harden in the refrigerator on wax paper for a few minutes and you're done.

Denver Bronco football Chocolate Covered Bacon Gift Box
Now add the chocolate covered bacon to your custom box.  You can give it away like that or you can add some coordinating ribbon in your team colors to finish it off.

These would be great treats at a tailgating party, football birthday party, Superbowl party, or for a fun and unique gift for the beloved man in your life!

10 Fun Football Projects

With September winding down, so are my football posts.  I have one or two more fun ideas to share, but I wanted to end the week by sharing some of my favorite and/or most popular Football posts since I started blogging.  I hope that one of them will inspire you to have a great Monday night football party tonight.  After all, there has to be at least something good about Mondays some days...

Football Helmet Cupcake Printable


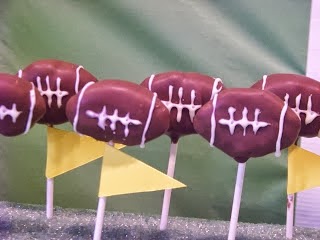
Football Cake Pop Tutorial

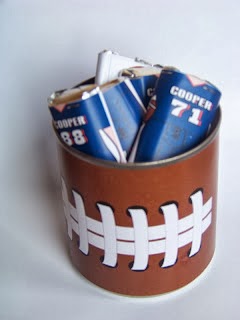
Football Can Printable

football Gum Head

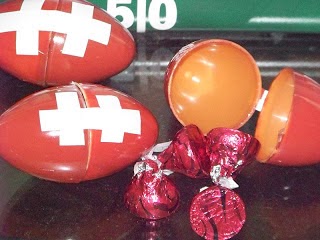
Football Party Treats

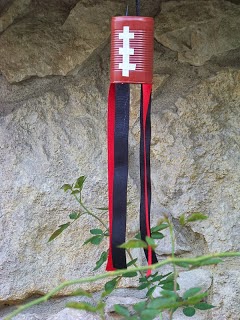
Football Windsock Decoration

Football Team Pennants

Football Bingo Printable

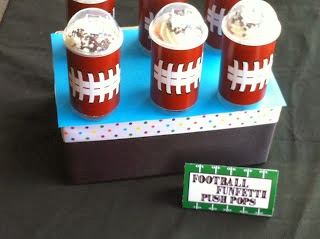
Football Push Pop Printable

Superbowl Football Party.

School Mascot Seeds Candy Topper Printable and Paint Tutorial


Living in Texas, where Football is B-I-G, I was often asked to make little treats that team moms could give to the Football players before a game.  Since there is a game every week, I am still trying to think of new treat ideas that will work for the players and teams.  That was the inspiration for my football candy bar minis, the football gum heads, and now for these school mascot candy topper seeds.

I am pretty excited about the versatility of these candy toppers.  I wrote the poem so they can be given before a football (or other sports) game, a big school test, a school play or performance, of just on a day you need a little extra sweet treat.


Plus, I made them so you can personalize each mascot with your school or team colors.  Each of the tags has a double square surrounding the poem so you can use your computer's paint program to color your tags personalized colors. 


It is pretty easy to paint the squares the colors you need.  First you need to purchase the topper that fits with your school or team.  You can find the list here.  Currently, I've done toppers for Eagles, Bulldogs, Huskies, Tigers, and Cougars.

Download and save your file.  Unzip the file and open the topper graphic that you fits your needs.

Each candy topper set comes with the printable toppers for 3x5 inch bags (with both bordered printer and borderless options), a candy tag topper, and a sandwich size bag topper, as well as the topper in a jpg file that you can resize to fit any other option you may need.

Open your JPG file in Paint.

Click on the "Pouring Paint Bucket" in the upper left side of your screen.  Next click on one of your school colors in the color selection.  Finally, click on the outermost square of each of the Eagle Seed graphics.

Repeat the process to color the inner square the second school color by clicking on the paint colors at the top, just as you did before.  Then click on the inner square for each of the Eagle Seed graphics.

When you are all done coloring your squares, save your Mascot Seeds by clicking on the upper left button called "File" and then clicking on "Save".  This will save your colored file over the original image.

To Print your mascot seeds, go to where you saved your original Mascot Seeds file.  Double click on the topper that you want to print until it opens in a new window.  Click the "Print" button at the top of the screen and print out your Mascot seeds!

There are thousands of different mascots out there, which ones would you like to see made into candy toppers?  Leave me a comment and I'll get working on them!