This post may contain affiliate links. When you click on a link, you are supporting DIY Party Mom, my family, and our blog fun. Thank you for your love and support!
Showing posts with label tinkerbell. Show all posts

Tinkerbell Fairy Birthday Party

Tinkerbell has joined her fairy friends at this fun birthday party for a cute little girl!

I tried to make this a pint sized woodland wonderland full of yummy treats and fun party favors.  I started by using a brown entry table that we had in our front room.  This makes the party more accessible for pint sized fingers.
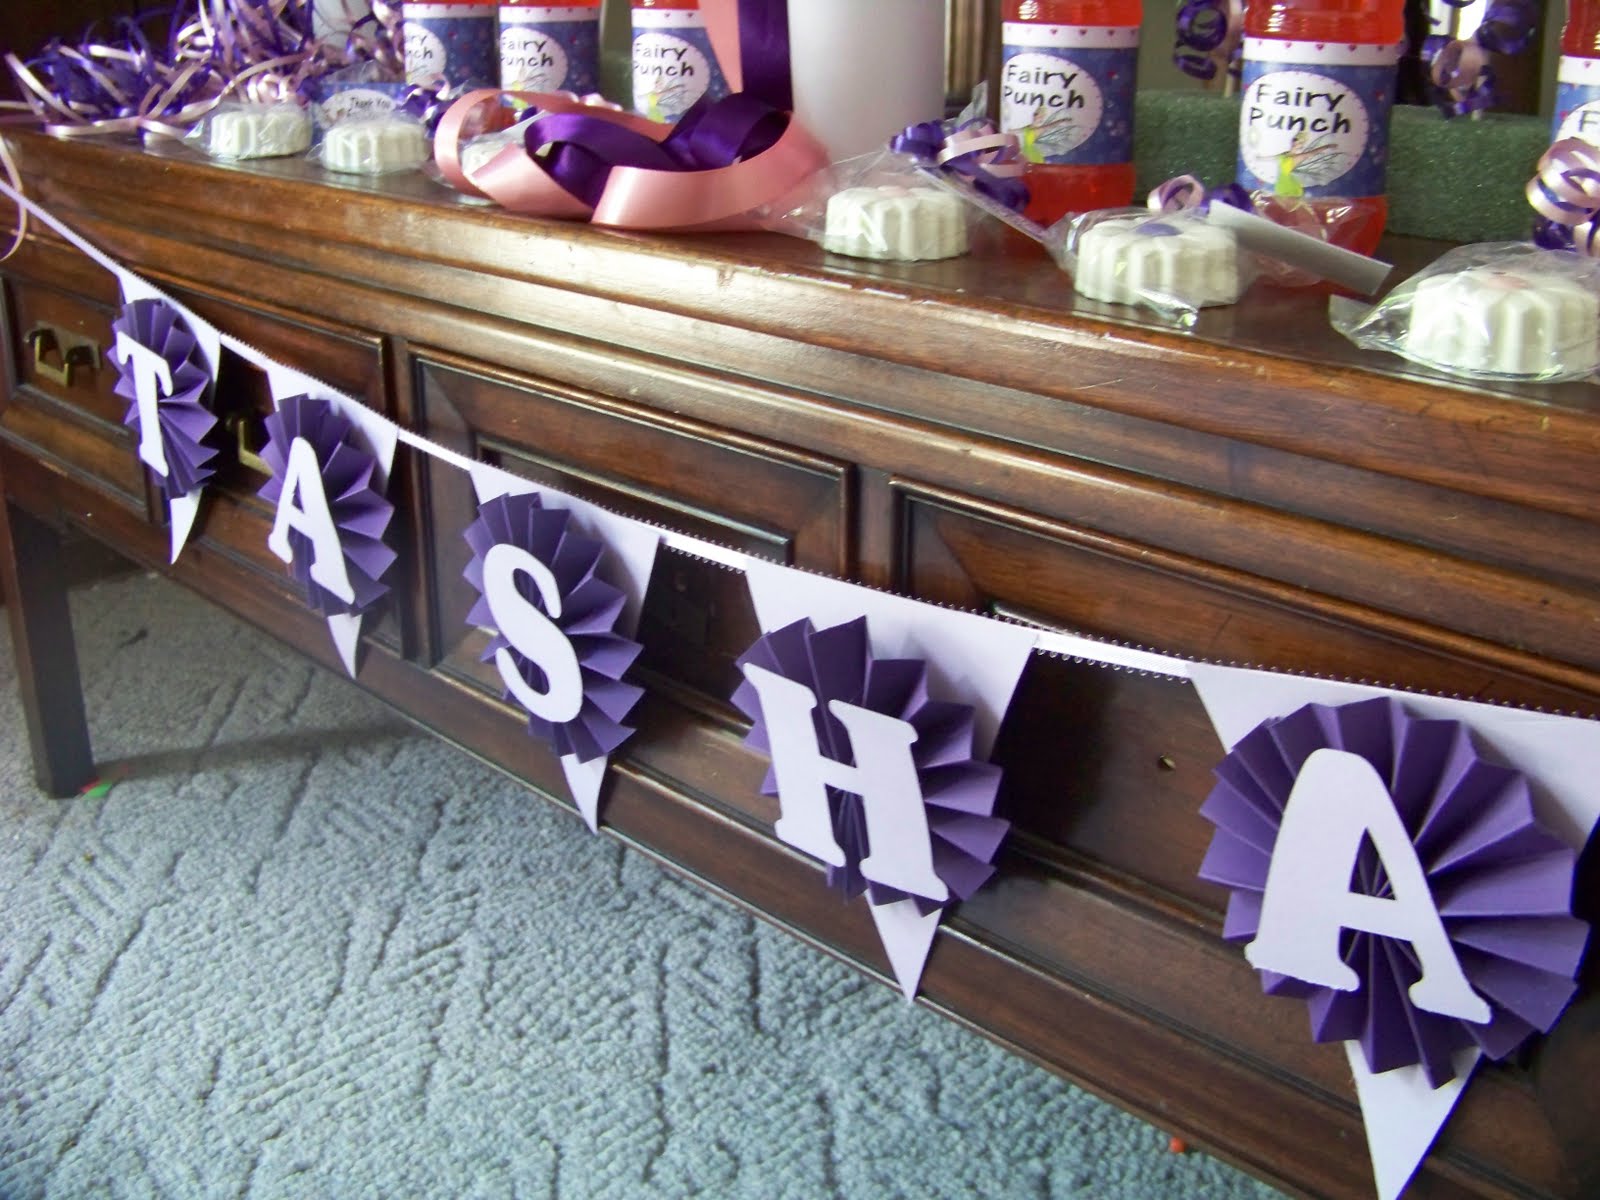
I added the name banner and a ribbon banner that we made HERE to the front and back of the table.

I ran with our Tinkerbell graphics and had her join almost every aspect of our table.

I wrapped water bottle labels around small bottles of pink punch to make Fairy Punch.
I placed these within little hands reach along the front of the table, three on each side.

In front of the water bottles are Chocolate Covered Oreos in a daisy shape.  The daisy oreos are white with pink and purple centers. 

Each daisy is tied up in a bag for the little girl to take home and has a Tinkerbell tag that says "Thank you for sharing my day."

On the very left side of the table is a "Wood Tree" to keep with the woodland theme.  I found this tree branch in my backyard and stuck it in a white vase.  On the tree limbs I hung the ribbon crowns that I made HERE.

Next to the tree and behind the Fairy Juice, are some Flower Brownie Pops that "The Daredevil" (my 10 year old son) helped me make.  These are made in a special pan and we just piped pink and purple chocolate in the shape of flowers on each brownie.

In the very center of the table inside a matching white vase, I placed the Ribbon Wands from A Girl and Her Needle.  These are now right in the reach of our little fairy princesses and they can play to their heart's content with these beautiful wands during and after our fairy party.

Don't forget that you can enter to win one of these beautiful wands!  Go HERE to enter by next Wednesday!

To the right of the wands, I placed the Chocolate Covered Popcorn that I made HERE inside our Tinkerbell Candy Cone favor cups.

And on the far right of the table, I have the Woodland Cupcake Stand that I made HERE.

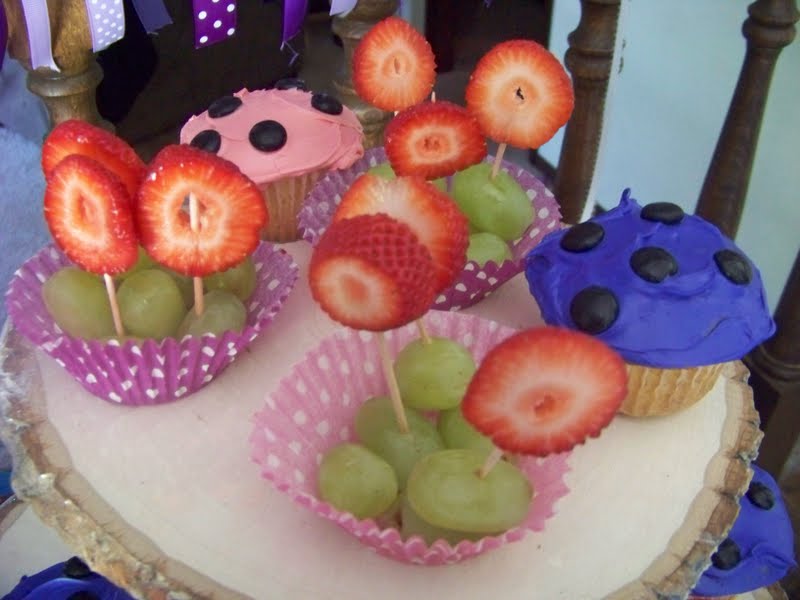
The cupcake stand has Pink and Purple Mushroom cupcakes.  To make these, I simply frosted a regular cupcake in pink and purple died vanilla frosting.  Then I added black M&Ms upside down in a random pattern over the cupcake.

To give a little break from the sweets of the day, I made Strawberry flowers too.  The flowers are strawberries cut into thin strips and placed on a toothpick.  The toothpicks are stuck inside grapes inside our polka dot cupcake liners.

I think it will be a sweet party for a sweet little girl that she and her fairy friends will enjoy!  We will even have a good time playing this Fairy Scavenger Hunt Printable

Woodland Fairy Cupcake Stand

When I started planning this party, I had every intention of having a Cupcake Fondue at the party.
I've wanted to do one ever since I first saw the idea from Bake It Pretty.
But after giving it a lot of consideration, we decided that it wasn't the right treat for our Tinkerbell fairy party.  It might get just a little TOO messy with little, sticky fingers everywhere.

So instead, we decided to go with cupcakes and other treats.
(You saw my Chocolate covered popcorn right? SO YUMMY!)

But I didn't want a traditional cupcake stand since it wouldn't go with the woodland theme I was shooting for.  I was a little stumped....until I went grocery shopping yesterday.

While shopping I found the current issue of Parent's magazine.  I don't usually look at this magazine since my kids seem a little old for the target audience...but the cover caught my eye and inside I found this beauty...
PERFECT!!!

So I set out to make my own.

I started by buying these wood pieces at Hobby Lobby
(30% off right now in the unfinished wood section)


Then I bought this wood grained type paper
(Can you tell despite bad photography?)
(4/$1.00 at Jo-Anns this week)

And went shopping in my pantry for these 4 "beauties"
(FREE...sorta)

Put them all together to form this cupcake stand!
It looks pretty cool in person.

Now I can't wait to go try some of those cute Mushroom cupcakes to go with...

Yea! time to go bake!!!

Ribbon Wand Party Favors GIVEAWAY

When trying to come up with the perfect party favor for any party theme, it can be kinda hard.
You want to find something that the kids will enjoy, that won't go home into the "junk" toy drawer (you know we all have one full of McDonald's and Dollar store toys), and that they will remember that "awesome" party every time they play with it.

I think today I did it!
I found the most awesome party favors for my Tinkerbell fairy party..and to celebrate
I'm sharing them with you!

When I was searching Etsy for great fairy party finds, I found these amazing Ribbon Wands from A Girl and Her Needle.  Aren't they the most amazing favors?  I contacted the lovely owner of the shop, Charmain and asked if she could make me some in my party colors.  She was so helpful and easy to work with.  She found some pretty ribbon and made me these beautiful wands.

I know the girls are going to absolutely love them!

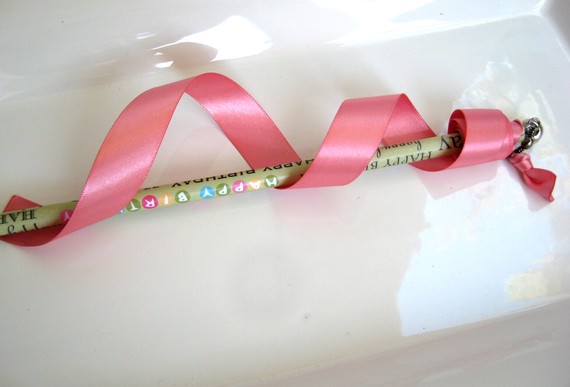
Each wand has a sweet pink or purple wooden 12 inch base with a fun swirl design on it.  Attached to the top of the wand is a soft tinkling bell (great for encouraging other fairies to come play) and 6 feet of beautiful matching ribbon perfect for twirling around and dancing in a fairy garden. 

Charmain has thought of everything and attached the ribbon using a swivel to prevent the girls from getting all tangled up during play.  Perfect for LONG hours of dancing in the sunlight.

If you check out A Girl and Her Needle you can find Ribbon Wands in so many different colors and styles.

A Pink Happy Birthday Ribbon Wand perfect for giving as a birthday gift!


This Fuscia Flower Ribbon Wand is one of my favorites because its so fun looking.
Wouldn't it be great at a 60's Hippy Party or for a fun Spring Fling?


This Camouflage Ribbon Wand makes me SMILE...how fun is that?

These Wedding Ribbon Wands are just beautiful!
I love the idea of using these to send off the bride and groom in a shower of flowing ribbon instead of bubbles or rice.  Wish I'd had them at my wedding instead of being pelted with rice!  (We found that stuff everywhere that night...not fun.)


I just know my little fairy princesses are going to love these fun ribbon wands.  I can already see them dancing in the garden with their ribbon wands and fun crowns flowing out around them.

And because I'm so excited to share them, Charmain has agreed to let us give away one wand!
(Isn't that awesome?!?!)

One lucky reader will receive their own Ribbon Wand to enjoy!
To Enter:

Simply leave a comment here letting us know which of the wands you would like.

Extra Entries:
(Be sure to come back and tell us you did!)
Contest ends next Wednesday at noon (EST).

GIVEAWAY NOW CLOSED.  THANK YOU.
CONGRATULATIONS TO OUR WINNER.


White Chocolate Popcorn Candy Cones

All the little fairies at our Tinkerbell party are going to enjoy having their own little treat candy cones to carry around at the party.  I made these cute Tinkerbell candy cones and filled with white chocolate popcorn for the party favor table...which seems to quickly be turning into a dessert and favor table.  I guess I just can't seem to stay away from all the yummy treats out there. (At least that explains my waistline issues..)

I have always wanted to try and make White Chocolate popcorn, but haven't done it despite my husband's urging. (It's one of his favorite treats he tells me....for the first time after 16 years of marriage. Huh!?!?)
So I made it today...and WOW!  It is good.  I think the kids will really enjoy it, and if not, apparently I know someone who will take all the leftovers.

I started off by making a batch of regular old popcorn.
I actually used my popcorn popper instead of microwave popcorn since I'd heard mixed things on using buttered popcorn in Chocolate covered popcorn.

I then took a package of white chocolate and separated it into 2 bowls.
I melted it in my microwave...be careful if you do this, white chocolate seems to burn MUCH easier than milk chocolate.  Melt it on 50% power for 1 minute intervals, stirring between until melted.
I like to color my own chocolate so that I don't have to purchase the colored bags of chocolate for just a few pieces of pink or purple chocolate.
I purchased Wilton Garden Candy Color Set and use it to die my chocolate.  Be sure what ever you use doesn't have water in it since that will ruin your chocolate.


When both my popcorn and chocolate was ready, I put half of the popcorn into a paper bag and poured the pink chocolate on top.


I closed the bag up and shook....and shook...and shook.

I'll admit, I did pour a little more chocolate on it at this point since it kind of looked like someone had sneezed all over the popcorn and there were only splatters of color.  I also decided I liked it with ALOT of chocolate on the popcorn.

When it was done I poured it on my Pampered Chef stoneware bar pan (had to throw that in there since I love this pan so much and would recommend it to everyone!) and refrigerated it until firm.

When it was ready, I added some of the pink and some of the purple popcorn to each of the candy cones.
The cones were then put into a green foam block to stand on the table ready for little hands to enjoy.


Tinkerbell Fairy Door Welcome Sign

Welcome to our Tinkerbell Fairy party!

This fun sign will sit at the door to welcome guests into our birthday party.
It was really easy to make and looks pretty cool sitting on my front door.

I started by printing out this design and cutting it out so that its a full page size.

I took my sign and outlined it on white foam board.
Then I cut the foam board shape out using my Hot Knife.

I simply ran my sign through my Xyron to turn it into a sticker and placed it on the foam board.
I added holes in the top corner and tied a ribbon.

It looks pretty cute and will welcome the guests into the Tinkerbell party in style!

I also forgot to show you the invitation we made for the party.
It's the size of a postcard so it can just be addressed and mailed.
Simple and easy.

Tinkerbell Party Favor Box & Giveaway

There are so many cute party favors you can have for a Tinkerbell or fairy party.
I had a hard time narrowing down which ones to have on my party favor table.
But these are my favorites...

 Each girl will have her own set of Fairy Wings to enjoy.
I'm sure the girls will love to prance around the party and play dress up at home later with these beautiful wings atop her shoulders.

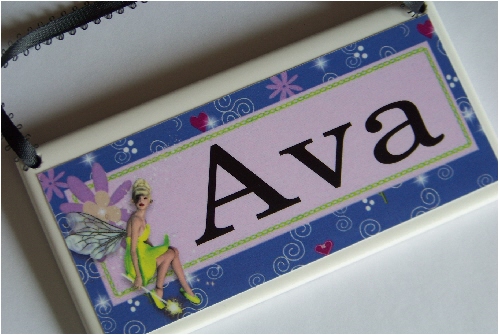
Each little girl will get to take home a personalized name plaque for her room with Tinkerbell watching over her each night.

I'm also planning to make these cute little boxes with Tinkerbell on them.  They can be personalized with any greeting the birthday girl wants and are going to be filled with Hershey kisses personalized with Tinkerbell graphics and sweet sayings.

Our little Fairy Princess is going to have kisses with her name and "Tasha's 7th Birthday" on them.  Plus pictures of Tinkerbell, for a total of 4 different designs.

If you want to make your own favor boxes, you can easily do so out of cute scrapbook paper.

Take a piece of cute paper...I have this Glitter Stock Set and I use it for ALOT of projects.
(Can I say I LOVE it?!?)


I cut it down to run through my printer and printed off a box template on the white side of the paper.
There are a lot of templates out there, so you can choose...but I recommend
JersGirl's templates.  I've always been happy with hers and she has a HUGE selection, so check her out.
You can get this votive holder template HERE.

Cut it out around the outside lines and score on the insides.

Fold along the score lines and glue together for a cute box.

You can embellish with cute scrapbook elements and fill with sweet treats!

Now for my request and giveaway....
This little girl's party isn't for a couple of months, but I'm trying to get it all set up now since I'll probably be moving soon...so I don't know who the guests are going to be yet.  Since I'm taking pictures so the mom can set up the party by herself, I need to make a few plaques to show her what to do with them.

And YOU benefit.
(If anyone wants one...)

I'm looking to make 5 Tinkerbell plaques...if you would like one with your little girl's name on it, please leave a comment here.  I'll pick 5 winners on May 4 at noon (EST) and make those plaques up.  After the photos on Friday, I will mail out the plaques to each of you.

If you would like one:

1) Leave a comment here telling me what name you would like on the plaque.
Don't forget to share your email so I can contact you if you win either by linking up your account, or giving me your email!

For extra entries...

2) Visit my Facebook page and become a Fan, then come back and let me know.
3) Visit my Store and come back and tell me your favorite project.
4) Become a follower on my blog and let me know you are!

I hope you guys are interested.  This is one of my most popular plaques...and I hope you'll help me out and let me share it with you!