This post may contain affiliate links. When you click on a link, you are supporting DIY Party Mom, my family, and our blog fun. Thank you for your love and support!

Relief Society Birthday Dinner Party

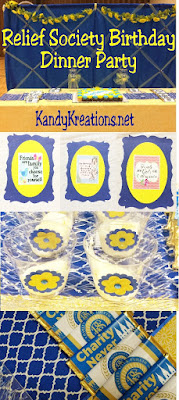
Come celebrate the Relief Society's birthday with us! We have delicious food, diy party decorations, great party printables, and a sweet dessert table.  Find out how we did it with all the details so you can celebrate too.

The women's organization in our church turns 175 years old this year.  It's a wonderful organization which does so much good world wide and in our tiny little area of the country.  I am thrilled to be a part of the service and good works these women do.  And I'm super excited to have been put in charge of the birthday party in our area.

DIY Fabric Table Runner

Our little party planning group decided to make our birthday celebration into a dinner party before the worldwide women's broadcast that our church shows.  We hoped that each would boost the attendance of the other and it would be a good chance to get together and socialize.

We chose to have Taco Salad since it was a low key meal and everyone loves it here.  That allowed us to spend more time and effort on the decorations, which is my favorite part of the party.

The Relief Society colors are blue and gold, so those were the two colors we interlaced into all our party decorations.  I found some super cute fabrics at Hobby Lobby and purchased a bunch of it on sale.  I was able to get three large yellow table cloths and three blue table runners for the large tables, and then reversed the color scheme for the smaller tables.  I used this DIY table runner technique to finish off the fabric and make it really pop.

Crystal Angel Centerpiece

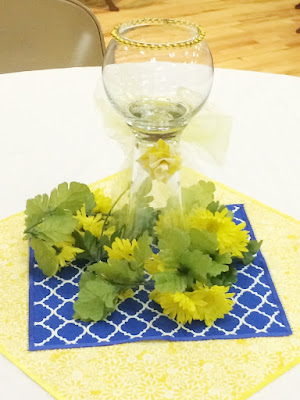
We also set up several round tables for the ladies to sit at.  Each one had a white table cloth with yellow and blue squares in the center.  The large yellow square was 18 inches and the smaller blue square was 11 inches.  I layered them on top of each other at angles to give some dimension and interest to the centerpiece. 

On top of the squares I created some glass minimilstic angels since we were going with flowers and angels as our theme.  I added a little more yellow to the angel by using the ribbon scrap flowers that I made here.  Then at the base of each angel I placed some yellow vine flowers I found on sale at Hobby Lobby.

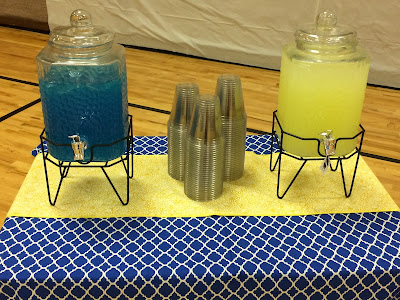
Beverage Table at the Relief Society dinner party

One of the small tables was used as a beverage table.  We had two one-and-a-half gallon beverage containers.  One was lemonade and the other had a mixture of blue Hawaiian punch and 7-up.  This kept the color scheme going and both were super yummy.

Birthday gift giveaway at the Relief Society Birthday

The other small table was our giveaway table.  We decided since it was our birthday we needed to give away a gift for everyone who arrived on time.  We hoped this would help people come and arrive with enough time to be able to enjoy the food before the broadcast began.

The table had a beautiful carved box that I was given by a dear friend years ago, another glass angel to match the dinner tables, and our giveaway basket.  We found a cute yellow bucket from the Spring line at Hobby Lobby and added a "Friends are God's Way of Taking Care of Us" printable to a 9x12 inch tile, a box of beautiful yellow note cards, a friends picture frame, a bottle of lotion, and some super yummy truffles from Nillsons Confections here in South Carolina.

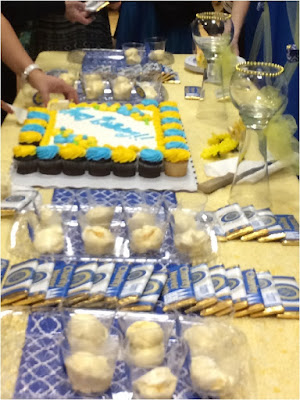
Relief Society birthday dessert table

We ended up using 2 tables for food and one table for the desserts.  I used a 8 foot PVC pipe backdrop that I showed you how to make here.  I have since learned to cut the pipes into 2 inch lengths and use connectors if needed so I can make the backdrop as big or as small as I needed.  It works great since I don't have these huge pipes tripping everyone in my party closet but instead can store them quick and easy.
DIY Fabric Angels

The backdrop is a blue cheap fabric that I found at Walmart.  To bring the yellow in, I crisscrossed yellow tulle at angles.  Where the tulle met, I added ribbon angels that I made here.  Then we draped some of the yellow flower vines from around the tables onto the top of the backdrop.

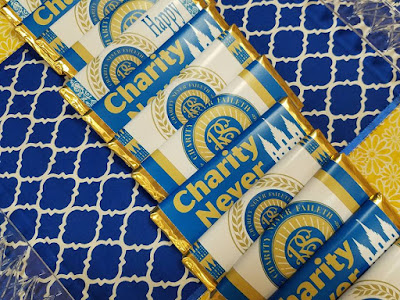
Printable Relief Society candy bar wrappers

A few years ago, I shared 4 different candy bar wrapper printables for the Relief Society birthday.  I printed them out and used gold foil to make the blue pop.  The candy bars lined down the sides of the dessert table in between the ice cream cups.

Ice Cream cups for the Birthday dessert table

We decided to pre scoop the ice cream into little cups so we wouldn't have to worry about it during the birthday party.  I was a little nervous about how this would go especially since I couldn't find cute yellow and blue cups that were in our price range.  So instead I bought a pack of clear cups and used my 1-7/16 inch scallop punch and my 1-1/4 inch flower punch to cut out blue and yellow flowers.  The larger flower is on plain blue cardstock, while the yellow flower has different patterns on it. Then I placed a blue gem in the center and glued it to the front of the cup.

I scooped the ice cream the morning of the party and placed them on baking sheets in the freezer.  Since I made sure to push the ice cream down below the rim, I layered the baking sheets on top of each other to avoid worry about freezer burn.  We kept the ice cream in the freezer until after the food was done and we were ready to cut the cake.  Then, we brought it out and layered it on the dessert table.

Releif Society Birthday Dessert Table

I never got the best picture of the dessert table but it turned out pretty cool with 2 angels and more yellow flowers at the back of the table and the yellow and blue birthday cake front and center.

Printable Home Decor Wall Hangings

The last bit of decoration that we added was to the church's walls.  Our gym has these "ugly" orange walls and they clashed so bad with our color scheme.  So we purchased some cheap, plastic, white table cloths and hung them over the walls to hide the color.

Then I used large pieces of blue and yellow cardstock to create frames to hang on the table clothed walls.  The printables that I hung in the frames (and in the gift basket tile) all are available in my printable shop.

Come celebrate the Relief Society's birthday with us! We have delicious food, diy party decorations, great party printables, and a sweet dessert table.  Find out how we did it with all the details so you can celebrate too.

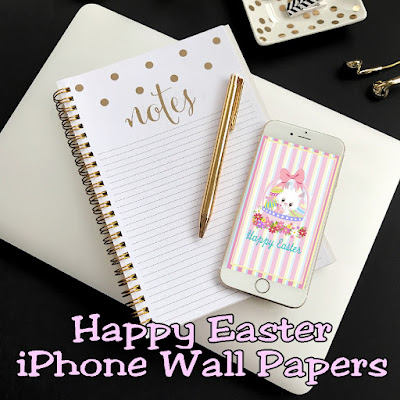
Happy Easter iPhone Wall Paper Freebies

You decorate your house for Easter, why not decorate your iPhone too? Be ready for Easter with these four cute wallpaper Easter decorations that get you hopping and ready for the Easter fun.

Baking is Love Made Edible Printable Quote

Baking is Love made Edible.  Frame this printable quote in your kitchen for a fun wall decoration to support your baking habit.

Share this PostPin ThisShare on TumblrShare on Google PlusEmail This

Share this quote with all your friends by clicking the link above or enjoy this quote printable in your home or as a great gift when framed for your best girlfriends.  Find it in the Printable Shop here.

Baking is Love made Edible.  Frame this printable quote in your kitchen for a fun wall decoration to support your baking habit.


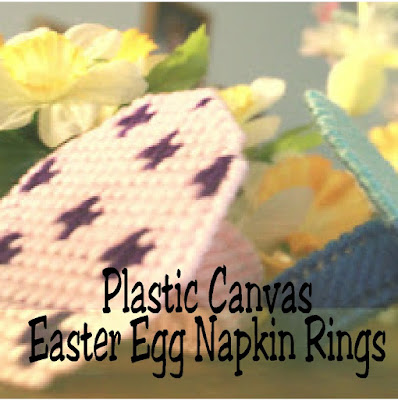
Plastic Canvas Easter Egg Napkin Rings

Create some fun and easy plastic canvas Easter egg napkin rings for your Easter table this year.  They are so simple and unique that you'll want to make a set for everyone's Easter basket!

Super Easy No Sew Fabric Table Runner

Do you hate to sew?  Me too! So I found a super easy way to make a no sew fabric table runner to turn my party tables from cool to Wow! without having to use my sewing machine.
I am no seamstress.  I admit that I know a few of the basics and have managed to sew a dress and an apron or two, but I do not enjoy it and I'll never be able to make beautiful sewn masterpieces.

I don't even like to sew a straight line most of the time.  I'd rather my sewing machine and I stay on different ends of the craft room if it's all the same.

But sometimes, you need a little extra touch of something special to turn a table into an awesome party table.  And adding a table runner with beautiful or fun fabric is one of the super easiest and quickest ways to do that.

Do you hate to sew?  Me too! So I found a super easy way to make a no sew fabric table runner to turn my party tables from cool to Wow! without having to use my sewing machine.

But have you seen the price of table runners?  Wow.  You'd think they were made of gold instead of some really ugly materials.  Maybe I don't know where to shop for table runners, but I haven't seen one yet that I wanted to put on any of my party tables.

So I decided to get a little creative and make my own....without my sewing machine fighting me every step of the project.

I went and found some super cute fabric from Hobby Lobby that matched my party colors.  I love how the blue and yellow just pop together.  Plus the loud colors of the blue set off the yellow flowers in the tablecloth just perfectly.  It's a perfect combination.

To make your own new sew fabric table runner, you'll need:

Do you hate to sew?  Me too! So I found a super easy way to make a no sew fabric table runner to turn my party tables from cool to Wow! without having to use my sewing machine

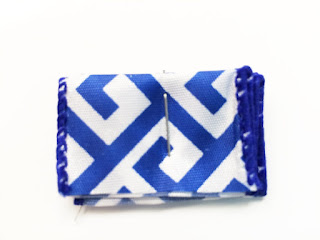
Since my tables are 8 feet long, I purchased 3 yards of the blue fabric.  The fabric was 44 inches wide, and I needed 4 table runners, so I cut the fabric into 11 inch by 3 yard strips using a rotary cutter and extra long 2 foot ruler.

Do you hate to sew?  Me too! So I found a super easy way to make a no sew fabric table runner to turn my party tables from cool to Wow! without having to use my sewing machine

You will want to pick some ribbon that coordinates with your fabric.  I have used ribbon with lace before, but for this project, I picked a small ribbon since the pattern was already so busy.

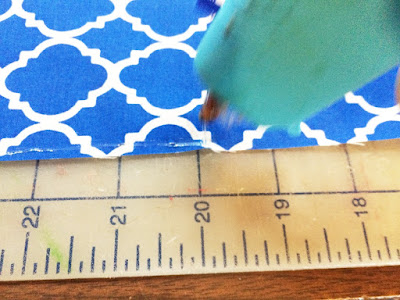
Heat your hot glue gun up using the fabric glue sticks and add a line down the edge of fabric.  You only want to go in about 5 inch spurts so your glue doesn't dry and harden before you can get the ribbon down.

Very carefully, lay the ribbon down so it covers the hot glue trail and the edge of your fabric.  Continue down the table runner in small sections until you reach the end.  Repeat on the other side and along the bottom and top edges if you want.

Do you hate to sew?  Me too! So I found a super easy way to make a no sew fabric table runner to turn my party tables from cool to Wow! without having to use my sewing machine

I used this same no sew technique to make 4 blue table runners, 2 yellow table runners, and 12 squares of different sizes for the centerpieces of my dinner tables.  They turned out beautiful and added that finishing touch to the fabric and tables. 

All with very little work and no frustrating, unhappy time with my sewing machine.

3 Easter Egg Crafts and Dare to Share Saturday


Whew!  What a week.  Just when I think our medical issues are under control and we an move along with the year, something else goes wrong.

How crazy is that?

But we move on anyway.  And this week, I've been slow in putting up more posts despite being crazy busy trying to get our big party ready.  I can't wait to show you the pictures next week. 

In the meantime, we have already started planning for our Easter party.  So I was thrilled to see so many fun Easter Egg crafts at last week's Dare to Share.  If you missed them, be sure to check these out:

http://www.realcoake.com/2014/03/easter-crafts.html

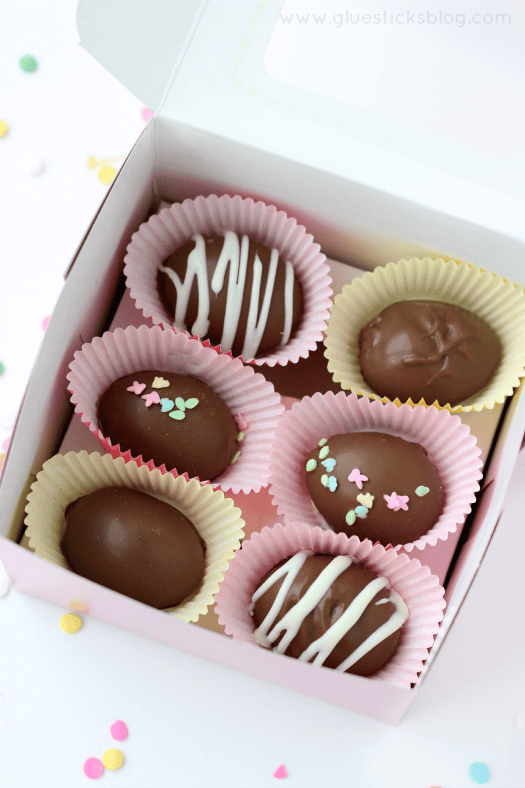
Chocolate Easter Eggs by Gluesticks

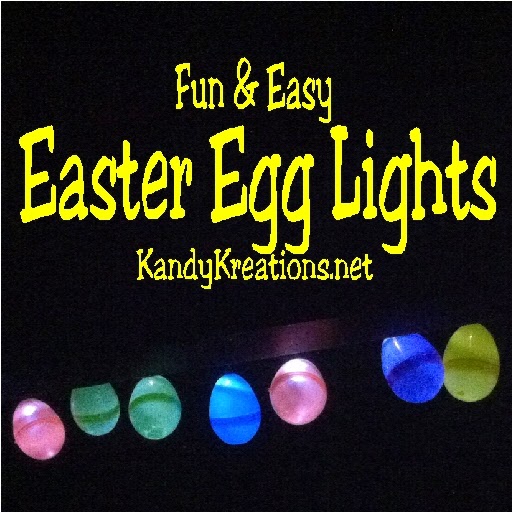
Easter Egg Lights by KandyKreations


I can't wait to see what you've been up to this week!


Egg-stravaganza Invitation

What a fun way to get your guests excited for your Easter party.  This printable invite is easy and so awesome to make.

Friends are Family Printable Quote

Friends are family you choose for yourself.  Print out a copy of this quote for all your friends today. 


Share this PostPin ThisShare on TumblrShare on Google PlusEmail This

Share this quote with all your friends by clicking the link above or enjoy this quote printable in your home or as a great gift when framed for your best girlfriends.  Find it in the Printable Shop here.

Friends are family you choose for yourself.  Print out a copy of this quote for all your friends today. 

DIY Ribbon Angel

Craft a beautiful DIY ribbon angel in just a few minutes with items already in your craft room.  You'll love giving this angel to friends or using as a beautiful party decoration or party favor.
Our big birthday dinner is this weekend.  I thought I had things ready, and then I sat down to make a list of what still needed to be done and I realized I was only half finished on a dozen projects.  I knew what I wanted to do, but I hadn't actually DONE it yet.

Do you ever have that problem?  Maybe it's just me.  Because I knew what I wanted, in my head it was all done.  But no....

So of course, this week I should be spending getting all those projects done.  Instead, I'm dreaming of more things that I want to add to the party décor.  So smart, right?!?  What can I say, maybe I'm a little bit nuts when it comes to parties.

Our party theme is going to be flowers and angels.  So as I'm looking at my party plans, I decided I needed more angels in my décor.

Craft a beautiful DIY ribbon angel in just a few minutes with items already in your craft room.  You'll love giving this angel to friends or using as a beautiful party decoration or party favor.

So I've decided to add more angels and flowers into my dessert table backdrop.  But because of the way I'm going to hang my backdrop, I needed the angels to be small and light weight.

So I found a way to make these cute little DIY ribbon angels.  These measure a little less than 2 inches high and about an inch wide.  And they are SO easy and quick to make.  Which is good because I need to get at least one project done today.

Craft a beautiful DIY ribbon angel in just a few minutes with items already in your craft room.  You'll love giving this angel to friends or using as a beautiful party decoration or party favor.

To make these ribbon angels, you'll need:
  • 1 1/2 inch wide WIRED ribbon
  • Stapler
  • Hot Glue gun
  • 15 mm gold bell
  • matching small flower or charm
Craft a beautiful DIY ribbon angel in just a few minutes with items already in your craft room.  You'll love giving this angel to friends or using as a beautiful party decoration or party favor.

Start by cutting two pieces of ribbon.  One should be 14 inches long and the other should be 6 inches long.

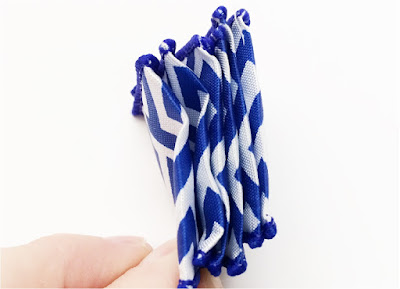
Take your longer ribbon and fan fold it into one inch lengths.  Fold the ribbon so the colored side is on the edge of the fold without the end pieces.  Does that make sense?  See how in the above picture the folded side has the pattern?  When you fan fold the ribbon back, one side will have the colored pattern while the other won't.  You want the colored folded end to have 7 pleats.

Craft a beautiful DIY ribbon angel in just a few minutes with items already in your craft room.  You'll love giving this angel to friends or using as a beautiful party decoration or party favor.

You will end up with a folded piece of ribbon that looks like the picture above.  Do your best to make sure the folds are evenly lined up and creased good.

Craft a beautiful DIY ribbon angel in just a few minutes with items already in your craft room.  You'll love giving this angel to friends or using as a beautiful party decoration or party favor.

Once you have your folded ribbon, cut off the very edge of one of the sides.  You'll cut right below the wired edge.  Now staple that cut edge as near to the side as you can without the staple coming off.  This will keep your ribbon angel together and forms her skirt.

Craft a beautiful DIY ribbon angel in just a few minutes with items already in your craft room.  You'll love giving this angel to friends or using as a beautiful party decoration or party favor.

Put aside the angel skirt and repeat the fan folding technique with the smaller length of ribbon.  On this piece you'll end up with 3 fan fold pleats.  These are your angel wings.  Fold the ribbon in half and crease it in the middle so you have a bit of a mark.  This will help you line up your stapler in the center of the ribbon to make the angel's wings.

Craft a beautiful DIY ribbon angel in just a few minutes with items already in your craft room.  You'll love giving this angel to friends or using as a beautiful party decoration or party favor.

Using your glue gun, add a line of glue to the top edge of your angel's dress.  Make sure both of the ribbon pieces have the patterned colored side facing the same way and add the smaller angel's wings to the top of the dress in a T pattern.

Craft a beautiful DIY ribbon angel in just a few minutes with items already in your craft room.  You'll love giving this angel to friends or using as a beautiful party decoration or party favor.

Add a little bit of glue to the bottom or your bell and place it on the top, center ribbon of the angel's wings to form the head.  If you want to hang your ribbon angel, you can loop a ribbon, string, or wire through the top of the bell and use that to hang the angel.

Craft a beautiful DIY ribbon angel in just a few minutes with items already in your craft room.  You'll love giving this angel to friends or using as a beautiful party decoration or party favor.

Using a bit of hot glue, add a small charm to the center of your angel to give her a little heart.  Since I'm going with angels and flowers, I made some small blue flowers out of clay to use. Finish your angel by spreading the angel's wings and dress out using the wire in the ribbon. 

You can hang these beautiful ribbon angels with a little bit of string, or even add a clip on the back to turn it into a pin.  The ideas are pretty endless as a party favor, decoration, or gift.  Since these are so quick and easy to make, you can make a ton for everyone on your guest list to take home after the party.

Craft a beautiful DIY ribbon angel in just a few minutes with items already in your craft room.  You'll love giving this angel to friends or using as a beautiful party decoration or party favor.

Dare to Share Saturday


I'm having all kinds of computer issues today, so we are just going to get down to the fun. I can't wait to see what you've been able to do while I'm sitting hear yelling, pleading, and sobbing into my computer screen! 


Beauty and the Beast Chocolate Covered Oreos

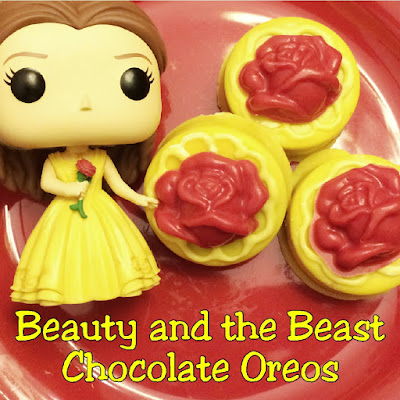
Beauty and the Beast chocolate covered Oreo cookies.  What a fun idea for a Beauty and the Beast birthday party or for a treat after watching the new movie! I think the girls would LOVE these yummy chocolate cookies to celebrate with.

I don't know if you've noticed or not, but I'm a little excited about the new Beauty and the Beast movie coming out this weekend.  I've shared a few crafts lately as I built up the excitement with my girlfriends to go see it.  (And now my boys want to go too! Maybe I'll get to see it twice! Yea!!)

I shared some Beauty and the Beast mini candy bar wrappers as this month's email freebie.  I purchased the new Funko Pop Belle and Beast figurines to keep Chip the Teacup company.  (He is still one of my favorite DIY projects ever.)  And today, I created some chocolate covered Oreos that I think Belle would swoon over. 

Beauty and the Beast chocolate covered Oreo cookies.  What a fun idea for a Beauty and the Beast birthday party or for a treat after watching the new movie! I think the girls would LOVE these yummy chocolate cookies to celebrate with.

And like most of the crafts I like to share, these chocolate covered Oreos are super easy and yummy!  I think they would make such a sweet dessert for a Beauty and the Beast party or as a post movie treat.  (Because after having movie popcorn, I'm always craving chocolate.  Am I the only one?)

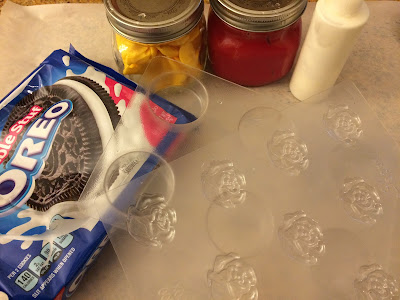
Items needed to make Beauty and the Beast chocolate covered Oreo cookies for a Beauty and the Beast party

To make these chocolate covered Oreos, I used:

How to make chocolate covered Oreo cookies

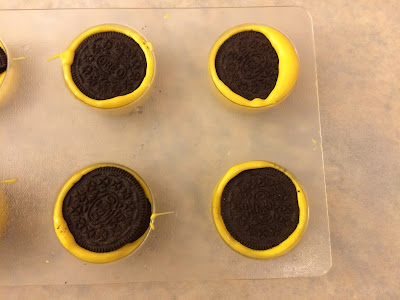
Start by melting your Yellow Chocolate Melts in a microwave or double boiler.  Once they are nice and smooth, add a little bit to the bottom of your Spinningleaf Chocolate Oreo Mold.  I love this mold because my Oreos come out so smooth and pretty every time.  So much less stress and work than hand dipping them.

Add your Oreo on top of the chocolate and then add a little more chocolate on top of the cookie.  Tap the mold on the counter carefully to even out the chocolate and release any air bubbles.  Once your cookies are ready, add them to the refrigerator for 20 minutes to a half hour to set. 

While they cookies are setting, melt your Red Chocolate Melts and fill your Bite Sized Rose chocolate mold with red chocolate.  Once again tap out on the counter to release any air bubbles and get your chocolate smooth.  Refrigerate the roses while your Oreos are setting.

Make Belle's yellow dress on a Chocoalte Oreo cookie

While the chocolate is still melted, add a little bit of your Yellow Chocolate Melts to a Mini Squeeze Bottle.  Make sure your chocolate is nice and smooth.  If you need it a little thinner to flow, add a small bit of vegetable oil or shortening to your chocolate and mix until smooth and thin enough to flow nicely.

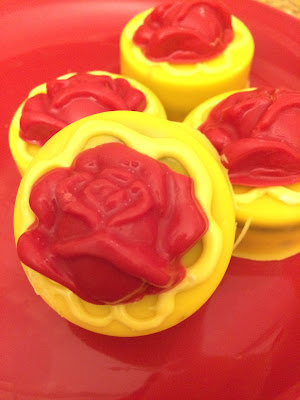
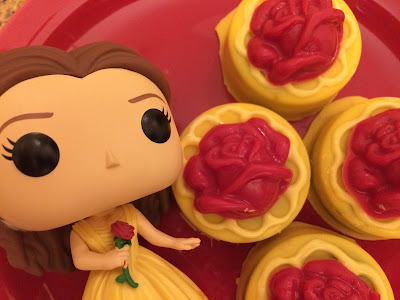
When your Oreos and roses are set, use your yellow chocolate squeeze bottle to pipe a flower shape to resemble the bottom of Belle's dress on the outside edge of the chocolate covered Oreo.  Allow the dress piping to harden for a few seconds as you do the other Oreos.

Add a large drop of yellow chocolate to the center of the Oreo and place one of the roses on top to secure it to the chocolate covered cookie.  Allow to harden as you repeat the process on the other cookies.

Beauty and the Beast chocolate covered Oreo cookies.  What a fun idea for a Beauty and the Beast birthday party or for a treat after watching the new movie! I think the girls would LOVE these yummy chocolate cookies to celebrate with.

Enjoy your cookies as you enjoy the new Beauty and the Beast movie!

Are you planning to go see the new movie this weekend?

Beauty and the Beast chocolate covered Oreo cookies.  What a fun idea for a Beauty and the Beast birthday party or for a treat after watching the new movie! I think the girls would LOVE these yummy chocolate cookies to celebrate with.


You are my Pot of Gold St Patricks Day Tag with Golden Oreos

Celebrate St Patrick's day with your Pot of Gold and these cute, easy, cheap St Patrick's day bag toppers.  You can make yummy gold coins from Oreo Cookies and add this printable bag topper for a great St Patrick's day gift that everyone will be lucky to receive!
With St Patrick's Day this weekend, I'm working on some fun party ideas for my family and friends.  One of the treats we'll have at our St Patrick's day party are these super cute Pot of Gold St Patrick's Day printable tags and golden Oreo cookies.

When you spray paint the Oreos, you get yummy little golden coins that are much better than those chocolate coins that you pay an arm and a leg for.  (At least that's what my kids tell me.)

Celebrate St Patrick's day with your Pot of Gold and these cute, easy, cheap St Patrick's day bag toppers.  You can make yummy gold coins from Oreo Cookies and add this printable bag topper for a great St Patrick's day gift that everyone will be lucky to receive!

Aren't they super cute?  These would make a fun giveaway for a class party or to each of your little "leprechauns" on St Patrick's Day.

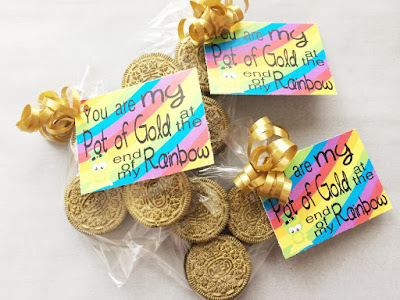
The tag reads "You are my Pot of Gold at the end of my Rainbow"

Celebrate St Patrick's day with your Pot of Gold and these cute, easy, cheap St Patrick's day bag toppers.  You can make yummy gold coins from Oreo Cookies and add this printable bag topper for a great St Patrick's day gift that everyone will be lucky to receive!

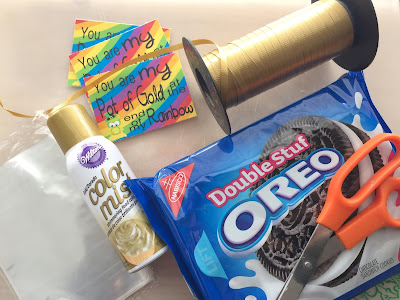
To make these Golden Oreos with Bag Toppers
  • Pot of Gold Tag Printable (at the bottom of the page)
  • Oreo Cookies
  • Gold Color Mist
  • Gold Curling Ribbon
  • Bags
  • Scissors
  • Hole Punch
Celebrate St Patrick's day with your Pot of Gold and these cute, easy, cheap St Patrick's day bag toppers.  You can make yummy gold coins from Oreo Cookies and add this printable bag topper for a great St Patrick's day gift that everyone will be lucky to receive!

The great thing about this project, is that right now, if you have the Favado or Flipp app, you can find a store nearby you that has Oreos on sale!  Talk about a win! 

But then if you also have the Ibotta app, you can purchase two bags of Oreo cookies and get $1.00 back! Even better win!  (Just thought I'd mention that if you're like me and need to save every penny possible when throwing a party or buying food for the bottom less pits we call kids.)

Once you have your Oreos, lay them out (I used a piece of Parchment) and spray the Color Mist Gold food die over the cookies.  Now they do dry really fast, but be sure to give them a minute before you flip the cookies over to spray the other side of the Oreos.

Celebrate St Patrick's day with your Pot of Gold and these cute, easy, cheap St Patrick's day bag toppers.  You can make yummy gold coins from Oreo Cookies and add this printable bag topper for a great St Patrick's day gift that everyone will be lucky to receive!

Once the Oreos are dry, place them in a bag and add the topper tags at the bottom of the page.  Super easy, cheap, and yummy.  You really will think you hit the pot of Gold!

Here's the St Patrick's Day bag topper printable:

Celebrate St Patrick's day with your Pot of Gold and these cute, easy, cheap St Patrick's day bag toppers.  You can make yummy gold coins from Oreo Cookies and add this printable bag topper for a great St Patrick's day gift that everyone will be lucky to receive!

What are you planning to do to celebrate St Patrick's day?  Check out more ideas on our St Patrick's Day pinterest board.

Celebrate St Patrick's day with your Pot of Gold and these cute, easy, cheap St Patrick's day bag toppers.  You can make yummy gold coins from Oreo Cookies and add this printable bag topper for a great St Patrick's day gift that everyone will be lucky to receive!


3 Dr Seuss Desserts and Dare to Share Saturday

separator" style="clear: both; text-align: center;">
Happy Weekend!

It's been such a fun week for me.  I'm finally getting back into crafting and parties.  I have so many fun ides coming up that I've been busy crafting away.

But I'm always sad when I miss an opportunity to have a little extra party fun.  I completely missed Dr. Seuss' birthday this month.  What?!?!?  It's not like I didn't realize it was there, I just got so busy, that I forgot to celebrate it with my kids.

I think that Dr. Seuss would be such a fun dinner party theme.  I could totally see Truffula trees all over the table, and green eggs and ham for dinner, and the Cat in the Hat striped decorations.  Maybe we'll do a family dinner party later this month with that theme.  After all, in our family, birthday's usually last the whole month long...after all...why not?

If you missed it, you guys shared some AWESOME Dr Seuss desserts at last week's Dare to Share Saturday.  If you want to have a little (late) Dr Seuss fun, be sure to check out these great features and then enjoy a little bit of Dr Seuss fun for dessert tonight.

Dr Seuss Truffula Tree Cupcake Toppers by Avas Alphabet

Red Fish Parfait by My Thoughts, Ideas, and Ramblings

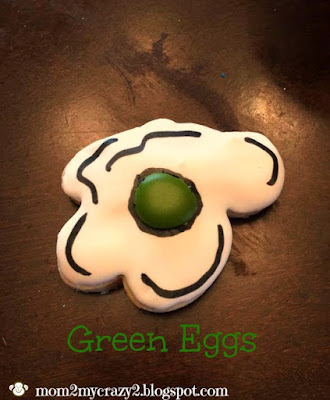
Dr Seuss Green Eggs Royal Icing Cookies by Mom 2 My Crazy 2

I can't wait to see what you've been up to this week!